
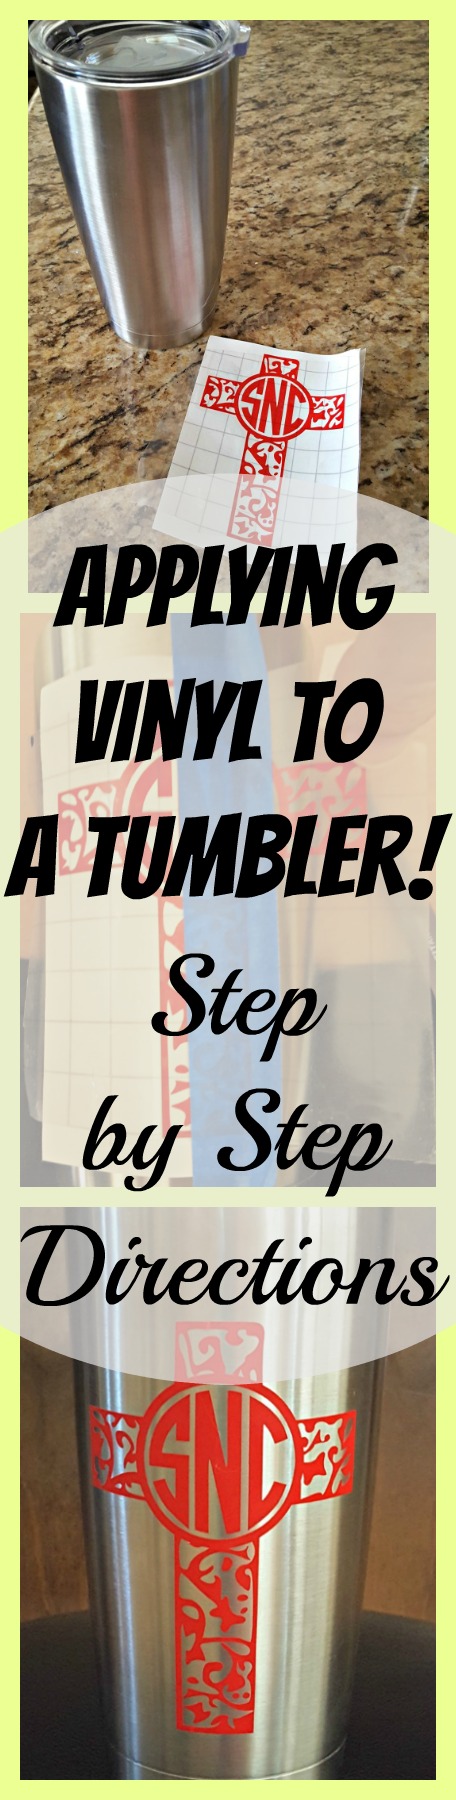
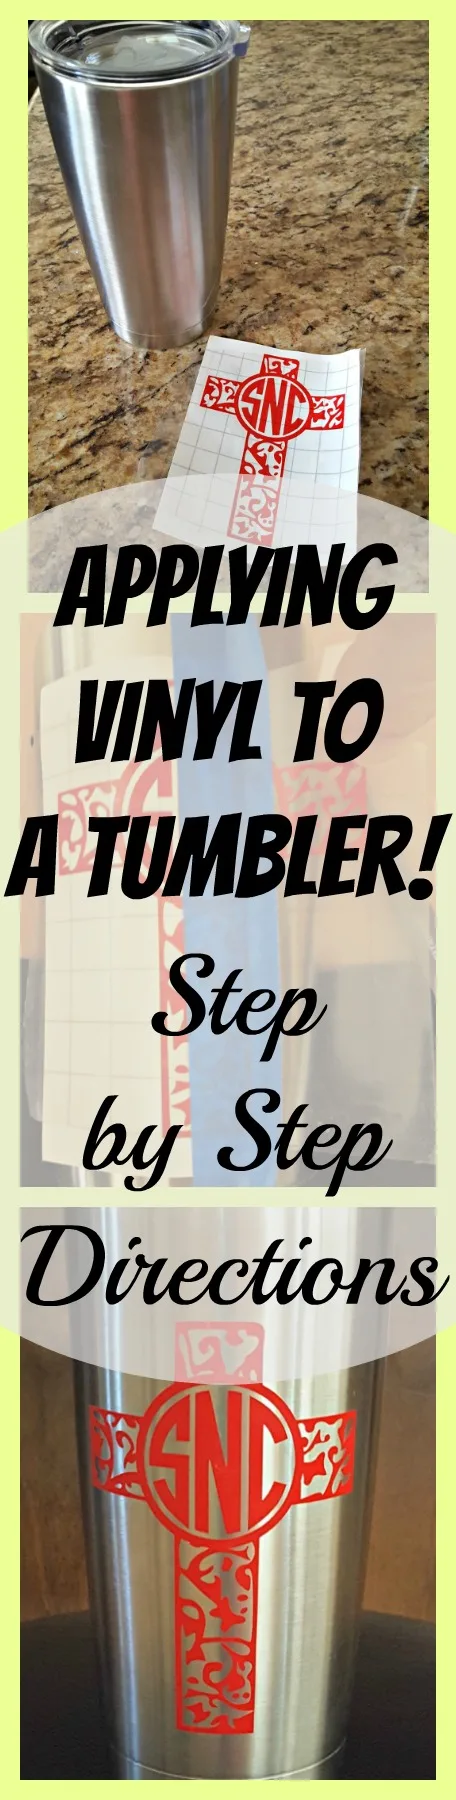
Applying vinyl to a tumbler is a super easy and fun way to personalize your cup. Find out how easy it is to apply straight and make sure to watch the video tutorial!
Yetis and Ozark Tumblers are all the rage these days! There are so many options out there, that sometimes it’s hard to know what to choose.
And when it comes to decorating tumblers and making them truly unique, the possibilities are endless!
I personally like the Ozark Tumblers or Built from Amazon or Walmart. They are a third of the price and work just as well. They keep ice and water cold for up to 30 hours.
They are amazing, it is the only cup I use anymore, for hot and cold drinks! I have about five different decorated stainless steel cups since I never leave home without one.
So along with being amazing tumblers, they are very fun to decorate. You can do almost anything and jazz them up to suit your personality.
So today I thought I’d share how to go about applying vinyl to a tumbler. I even have a video tutorial and printable directions at the bottom of the post if that’s more helpful.

Best Vinyl for Tumblers
So before we get into how to add a decal to a tumbler, let’s talk about the best vinyl to make the decal with.
When it comes to adhesive vinyl, there are two types: removable also called indoor vinyl, and permanent also called outdoor vinyl. What they are called depends on the brand you are using.
For tumblers, you definitely want to use a permanent or outdoor vinyl. These vinyls are intended to get wet and have a longer-lasting adhesive on them.
My personal favorites are Cricut and Oracal brands. Cricut calls the vinyl you want to use Premium Permanent vinyl. Oracal names their vinyls with numbers, so Oracal 651 is their outdoor vinyl.
Even though these types of vinyl are called permanent they can still peel off or be removed when high heat is applied to them. That is why you should never put a mug or anything with vinyl on it in the dishwasher or in the microwave.
Best Types of Vinyl Decals for Cups
Now that you know what type of vinyl to use on a mug, you might be wondering if a certain type of decal will last longer. In my experience, the answer is yes.
Thicker letters and images are ideal and will last longer. If I ever have an issue of vinyl coming up, it’s because the letter was super skinny or had an intricate loop at the end. The more surface area that the adhesive is on, the better it will adhere to the stainless steel or mug.
You can try to bold the font you are using to create a thicker font. If you don’t have Cricut Access, check out my favorite free fonts for Cricut.
Applying Vinyl to a Tumbler Tutorial
Disclosure: This post contains affiliate links from Amazon and/or Walmart.com. I receive a small commission at no cost to you when you make a purchase using my links.
This process will work for either Ozark Stainless Steel mugs or Yetis.
You can purchase Ozark tumblers by clicking here. Or for 20 oz click here and for 30 oz tumblers click here!
Or you can always browse my Amazon storefront with my complete DIY Tumbler supply list.
The first thing you need is a vinyl decal.
I cut mine out with my favorite tool, my Cricut Explore Air™. A great thing about these small decals is that you can use any Cricut machine to cut them out – the Cricut Joy, Joy Xtra, Cricut Explore Air line, or the Cricut Maker family. (Don’t have a machine yet? Find out which Cricut is best for you here!)
Weed the vinyl and apply transfer paper over it. (For more detailed information on this part see my post here.)
To learn more about a Cricut, make sure to check out my Ultimate Resource of Cricut Ideas.

Prepping a Mug for the Decal
Make sure your stainless steel tumbler or mug is washed and dried. Next, clean the mug with rubbing alcohol. This helps get any remaining grease or residue off that will prevent the vinyl from adhering properly.
I just use a cotton pad or paper towel and wipe it around the whole thing to get all oils off so the vinyl can seal better.
Getting Vinyl Straight on a Tumbler
I have a full video tutorial on the side of the post and also a tumbler web story here, so make sure to watch it with the volume on to see how to apply a decal in action!
Apply a piece of transfer tape to your weeded out vinyl decal.
Then with the paper backing still on position the decal on the tumbler where you want it.
I find it easiest to use the Hinge method. Place a strip of blue painter’s tape down the center to secure it in place.


Peel off one half of the transfer paper and cut off the backing while holding the sticky transfer paper.


Pull the transfer paper so it’s straight and lay it gently down on the mug. Rub on the decal so it adheres. Then remove the blue tape.


Now that it is secure in its position, peel off the other side of the paper backing. Pull a little bit so it’s taught, and gently lay it down while smoothing it out with your fingers.


After rubbing down the vinyl you can slowly start peeling off the transfer tape.


There you have it. Easy peasy once you learn how to apply vinyl to a tumbler!
Tips for Ensuring the Vinyl Sticks Well!
Let the vinyl cure on the mug for 48-72 hours to make sure it sticks really well. So do not get it wet for 72 hours!
I will also run an embossing heat gun back and forth hovering over the vinyl and then press down really hard with my finger to make sure it adheres really well. This heats the vinyl glue a little.
Just be careful, not to touch it when it’s too hot! If you have a heat protector glove that you get with a curling iron, use that to help protect your fingers.
Again, anything with vinyl should be hand washed and washed gently. No heavy scrubbing and no dishwashers! Stainless steel mugs should not be put in the dishwasher anyway, it messes with the keeping hot and cold mechanism.
Sealing Vinyl on a Tumbler
I get a lot of questions on how to seal vinyl on a tumbler. You might also get different answers on who you ask.
I only seal my vinyl decals if I am making a glitter tumbler or painting it to seal the paint. I never have to apply any kind of seal on my vinyl tumblers or vinyl mugs and they’ve lasted for years.
If you use the permanent vinyl and let it cure, you should not need a sealant. However, if you really want to add a sealant, the one that lasts the longest and is FDA approved is epoxy.
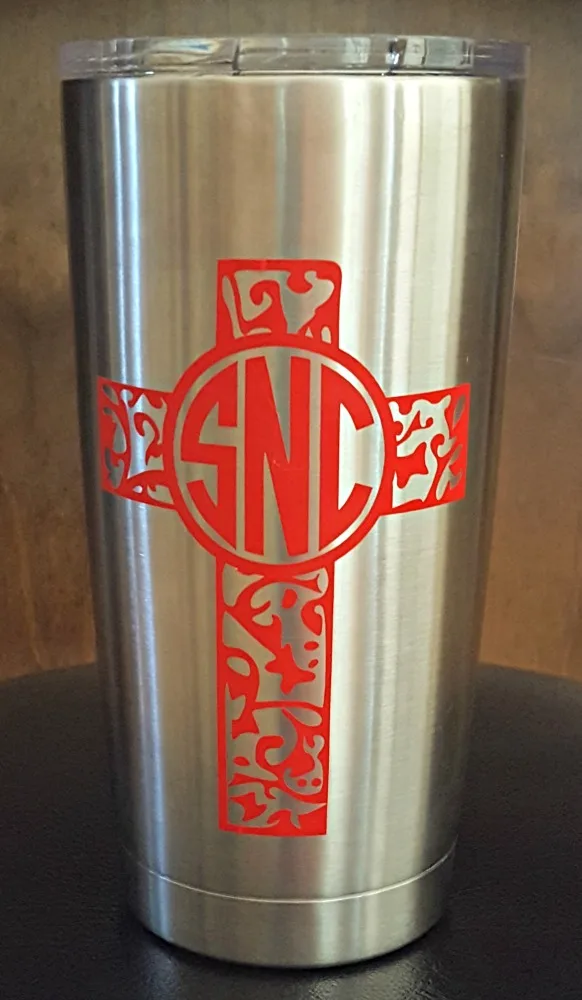
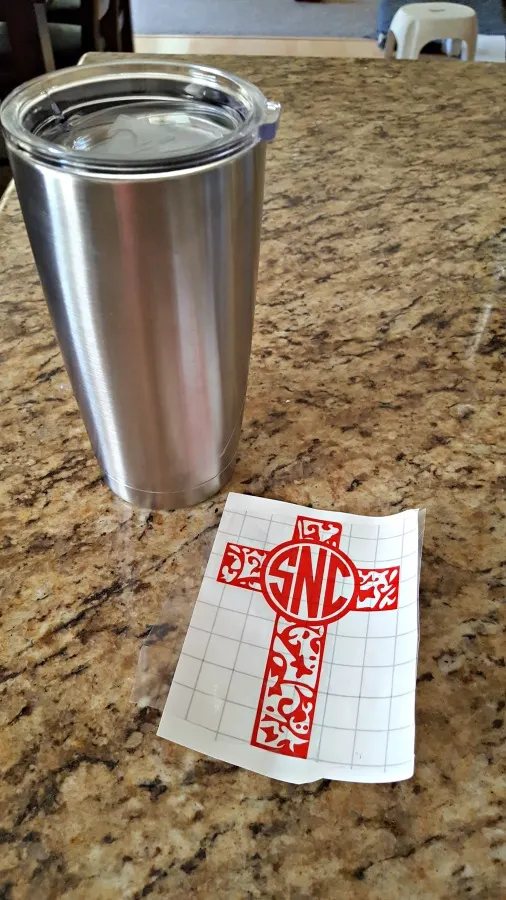
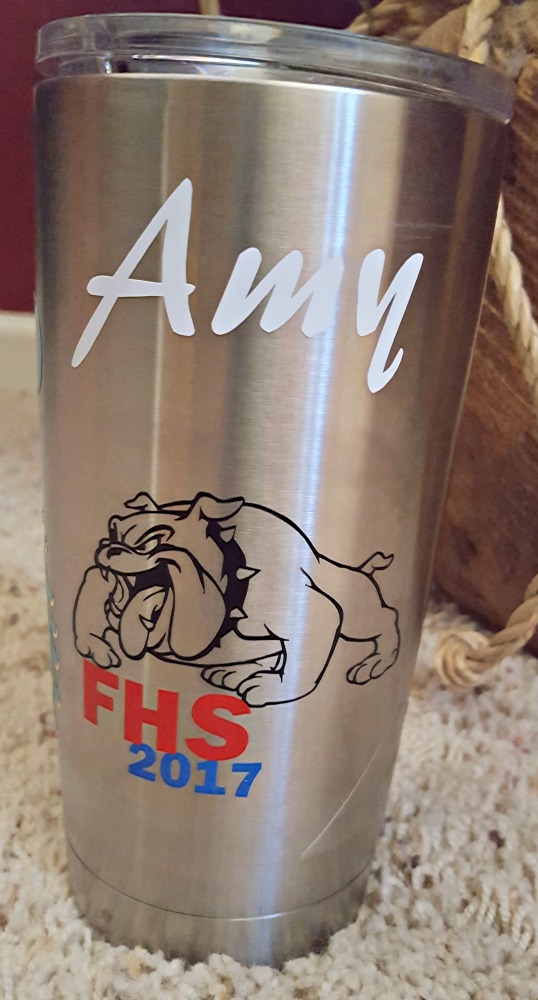
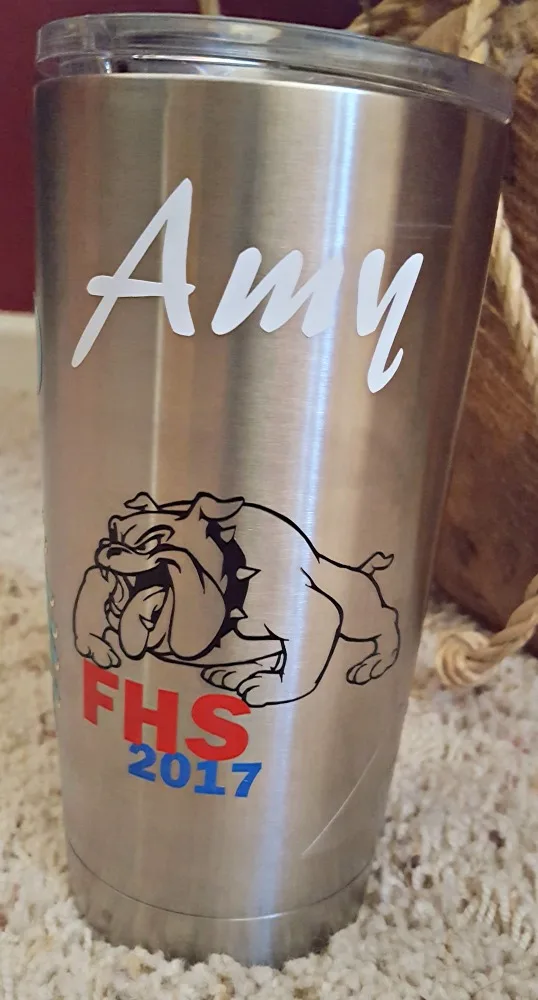
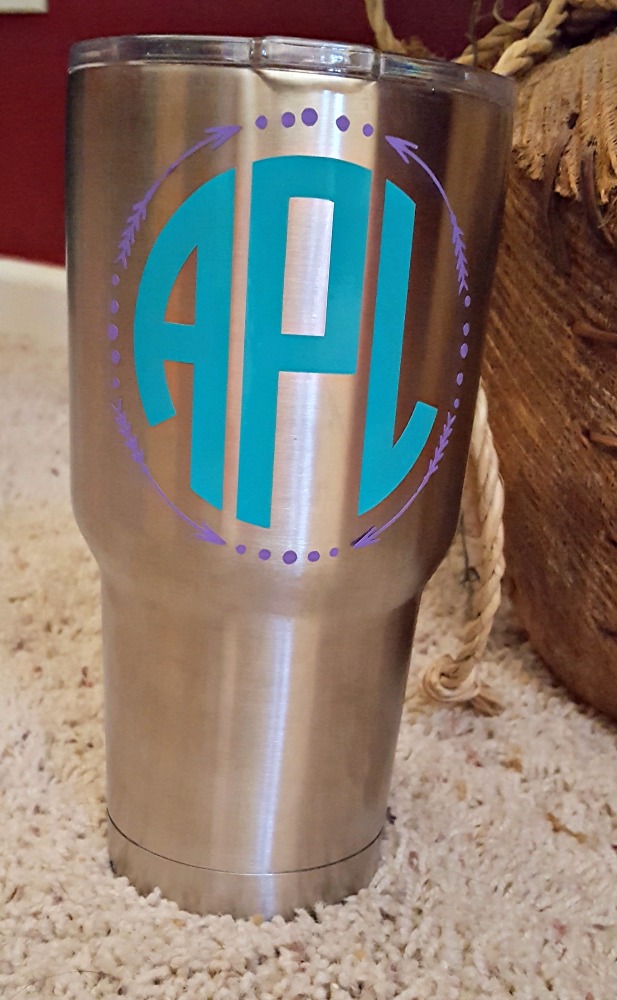
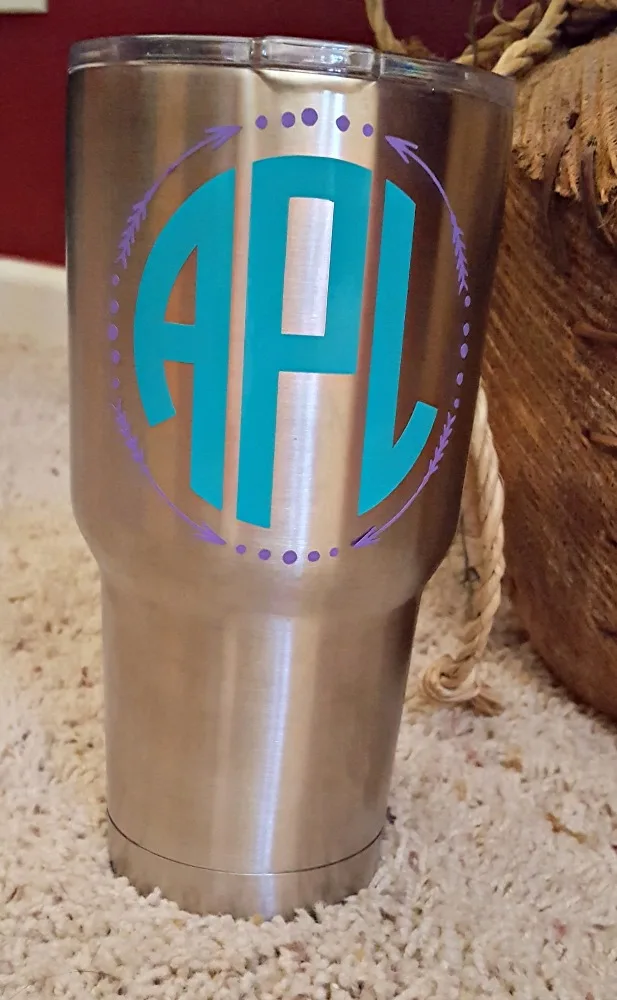
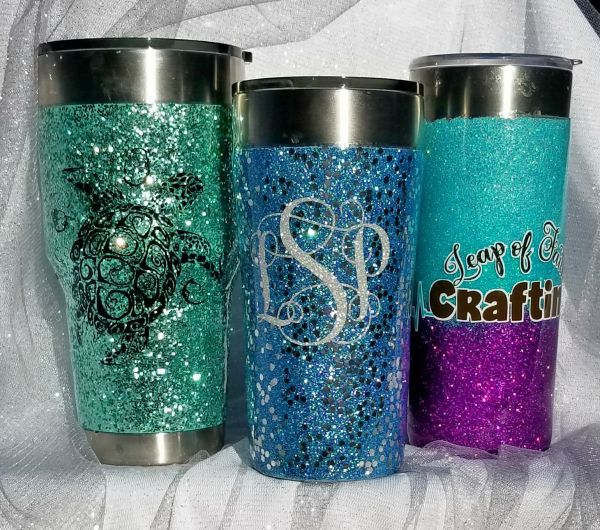
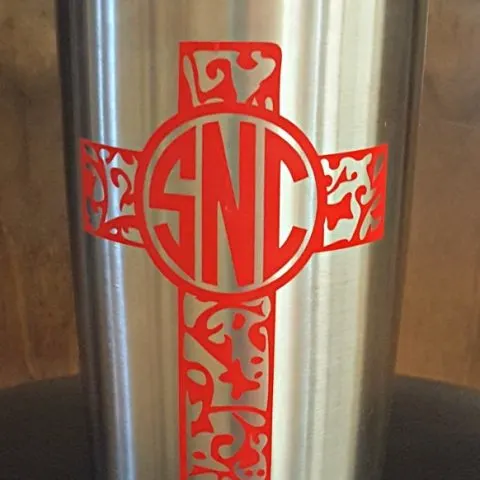
Tumbler Decal Ideas
Here are a few of the other ones I have made. Easy and fun!
These make great gifts, especially for those hard to buy for people! For free SVG files you can use for tumblers, make sure to check out our heart svg files and cross svg bundle.


A Cricut machine can make so many personalized presents. I have an entire roundup of just Cricut personalized gift ideas if you want to check it out.
The same goes for applying vinyl to a mug. I love to use Dollar Tree mugs and add permanent vinyl for every season!
Once you get used to applying vinyl to cups, you can start to eyeball it as I demonstrate below.
DIY Fall Mugs
Disclosure: This post contains affiliate links from Amazon and/or Cricut.com. I receive a small commission at no cost to you when you make a purchase using my links (purple text).
- Mugs- I found these plain mugs at the Dollar Tree.
- Cricut cutting machine – always check prices between Cricut.com and Amazon (click links to compare!) or another cutting machine
- Permanent Vinyl
- Transfer tape
- rubbing alcohol


How to Apply Vinyl to Mugs
Prep your ceramic mugs by cleaning them off with rubbing alcohol. This removes any grease and helps the adhesion.
Find a file that you’d like to put on a Fall mug. I found both of these in Cricut Access. Cut the vinyl out with permanent/outdoor vinyl and weed off the extra vinyl.


Place a piece of transfer tape over the vinyl and scrape it down well.


Now instead of using the hinge method, let’s use the eye ball method! Peel the paper off the back of the vinyl (the vinyl should be sticking to the transfer tape).


Center it on the mug and press down the image in the center first. Then press it down towards the sides. Press it all down well with your fingers or a scraper.


Peel off the transfer tape.


If you have a second color, repeat the same steps. Add transfer tape to it. Scrape it down and then center it where it needs to go.


Make sure the vinyl cures for 72 hours before it gets wet.


There you have it! I made these cute fall mugs to put in our neighborhood Boo basket. I made two different ones.


Make sure the Vinyl can not be put in a dishwasher or it can come off. You can put my printable “handwash with care” in it if you’d like.
Taking It Beyond Vinyl!
If you’d like to learn how to seal your tumblers with epoxy, check out my tutorial here!

There are even more ways to decorate stainless steel mugs! If you’d like to check out my ultimate guide on personalizing stainless steel tumblers and what I like to use, click here!


Here are the printable instructions.

Applying Vinyl to a Tumbler So That's It's Always Straight!
Learn how to apply vinyl to a tumbler or mug so that it's always straight!
Materials
- Permanent Vinyl
- Tumbler
- Transfer Tape
- Blue Painter's Tape
- Rubbing alcohol and paper towel
Instructions
- Design and cut out vinyl decal with a cutting machine (or buy a decal!)
- Weed off the extra vinyl.
- Clean your tumbler with rubbing alcohol and let dry.
- Apply transfer tape to your decal and scrape it down (do not remove paper backing yet!)
- Position decal on tumbler and use a ruler if necessary to make sure it's straight.
- Apply a strip of painter's tape down the middle of the decal.
- Fold over one side of the decal and peel it off the backing. Cut the backing off.
- Place down the decal and firmly press it on the tumbler.
- Remove painter's tape.
- Flip over the other side of the decal and remove the paper backing.
- Flip it back over and lay it down on tumbler.
- Scrape down well and remove the transfer tape!
- Let the vinyl cure for 72 hours before it gets wet.
- Enjoy your nice new tumbler! Hand wash only!
Notes
Make sure to read step by step instructions with photos in post and watch the video!
Permanent vinyl is waterproof but it can not be washed in the dishwasher or heated too long in the microwave.
Recommended Products
As an Amazon Associate and member of other affiliate programs, I earn from qualifying purchases.

Thanks for stopping by!! What would you decorate a mug with??
Have a creative day!


Joann
Sunday 25th of April 2021
Thanks for the clear instructions. Appreciate it!
Suzanne
Saturday 26th of December 2020
Where can I get the file for the cross monogram? Your blog is very helpful. Thank You.
Leap of Faith Crafting
Friday 1st of January 2021
Thank you Suzanne! Actually, I bought that file years ago, so sorry I can't give you a great answer. You can probably find something similar on Etsy!
Alicia Canning
Saturday 19th of September 2020
Do you have a template I can purchase that will help me with wrapping a 30 oz Ozark tumbler.? I want to wrap the mid and lower part of my tumbler with vinyl and I am having a very hard time.
Leap of Faith Crafting
Monday 21st of September 2020
No, I'm sorry I don't! Maybe on Etsy??
Katie
Wednesday 15th of April 2020
Hi! I’m looking in between getting the maker or the air! I’m really only getting one to make my own decals for tumblers but was wondering what you recommend between the 2! Just looking for some pointers :)
Leap of Faith Crafting
Wednesday 15th of April 2020
Hi Katie, how fun, congrats! If you are only looking for mostly decals I would say the Explore Air or even the Cricut Joy. I have a post on the difference between the Maker and Explore https://leapoffaithcrafting.com/which-cricut-to-buy/ and a post about the New Cricut Joy https://leapoffaithcrafting.com/cricut-joy-projects/
ETHEL NYGAARD
Friday 20th of December 2019
I made two mugs as gifts for Christmas this year. I used oracal 651 on both. The lettering on the first is so smooth, you cannot feel it but on the second mug, you can feel every letter. I seems to be sticking fine but it worries me that it might not hold up. The only difference in them is I used different colors and did not use the mat for the one that I can feel. Is this normal?
Leap of Faith Crafting
Friday 27th of December 2019
Hmmm, that is weird! If they are both 651 I am not sure why you would feel it differently. Make take a hairdryer or embossing gun to the second mug to heat it up and then press it down again to see if you can get it smoother. Just don't touch it when it's too hot!