
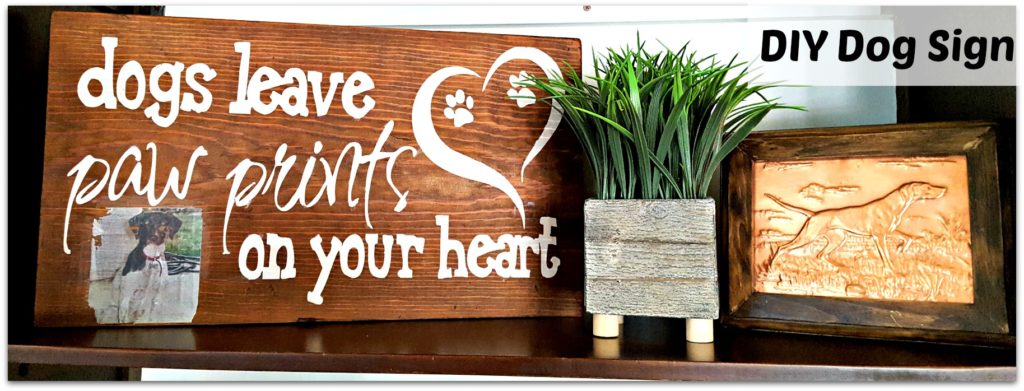
Make easy and beautiful DIY dog signs to remember your beloved furry friend. Learn how to transfer a photo to wood easily!
A few months ago I made this DIY wood dog sign with a photo after we lost our sweet Maddie. She was a 14.5 year old German Short-Haired Pointer that we said goodbye to right before Christmas.
She was our first baby and I love being a dog mom. My husband and I got her even before we were married and we took her everywhere before we had kids.
I even have a whole photo album of just her (up until the kids were born!). I wanted to have something prominent in our house that we would see every day, so this is what I came up with.

This was my first time trying transferring a picture to wood and I think it would have come out better on a lighter piece of wood. I have since done a few more and the lighter wood definitely looks sharper but I am happy with how this came out!
Materials for DIY Wood Dog Sign with Transferred Picture
Disclosure: This post contains affiliate links from Shareasale, Cricut, Awin, CreativeFabrica, and Amazon.com. I receive a small commission at no cost to you when you make a purchase using my links (purple text). As an Amazon Associate, I earn from qualifying purchases.
-
- Piece of wood – I had a spare piece so I fit the file to fit it
- Design a file or you can buy on Etsy – I found this one on a Facebook site, it is not mine.
- Vinyl to use as stencil
- Cricut Explore or other cutting machine
- Mod Podge
- Chalk paint
- Mod Podge Photo Transfer Medium
How to Make DIY Dog Signs
I found this Dogs Leave Paw Prints On your Heart SVG file in a Facebook group years ago. You can also find SVG files to use on Etsy or within Cricut Access.
Also, if you are new to CDS, make sure to check out my series of Cricut Design Space 101 tutorials to get started.
Since I wanted the dog sign painted, I used the vinyl as a stencil. You could also just cut out vinyl and add it to the sign.
The first thing you will need to do is cut out your design onto vinyl with a Cricut cutting machine or other vinyl cutting machine. You will be using it as a stencil so weed out the lettering.


Then attach the vinyl to the wood with transfer tape. I use the hinge method to apply large designs. You can click here to read more in depth instructions on applying vinyl with the hinge method.


Then peel off the transfer tape.

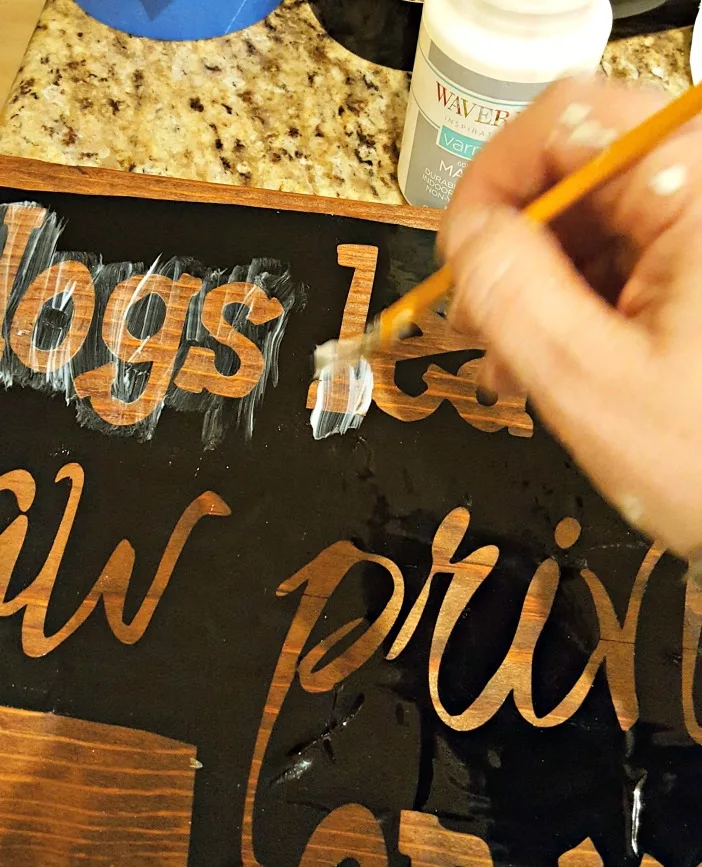
After you peel the transfer paper off and the vinyl is pressed down well, I put a coat of regular mod podge around the edges of the letters to help prevent bleeding under.

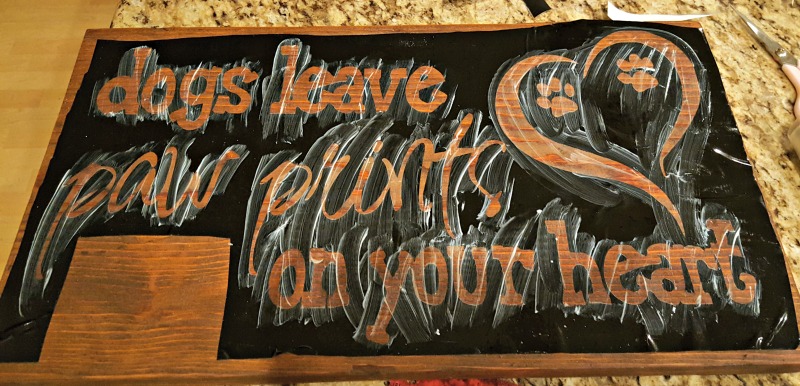

After that is dry, paint in the lettering, let that dry, and then peel off the vinyl.
Transferring Pet Photo To Sign
Now on to transferring the photo… You’ll need a photo printed on regular white paper with a LASER printer. It will not work with an inkjet.
If you don’t have a laser printer, you can have an office supply store print one for you for pretty cheap. Size it and cut it to your liking. (You will be flipping over the photo so if you have any words on it make sure to print a mirror image. With just a picture it usually doesn’t matter if it ends up flipped.)

I put my picture on a piece of wax paper so the medium wouldn’t get everywhere. Use a paint brush to apply the Mod Podge Medium Transfer to the top of the whole photo. Make sure every little part is covered with the medium.


Then flip the paper over and put it on the wood dog sign. Use a scraper or credit card to gently scrape it down flat. Some of the glue will come out of the edges. Make sure to wipe it off so it doesn’t dry on the wood.

Now you need to wait… for 24 hours!!! For those of us who are impatient, this is the hard part, but just put it aside and do something else!
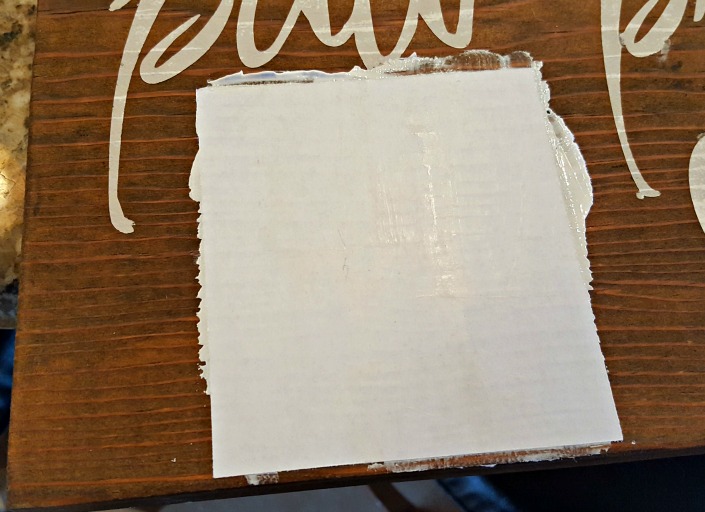
After 24 hours, you will start peeling it off. I put a wet wash cloth over it for a minute to get it wet and then started rubbing it off with my fingers. You can also rub it off with a washcloth or a sponge.

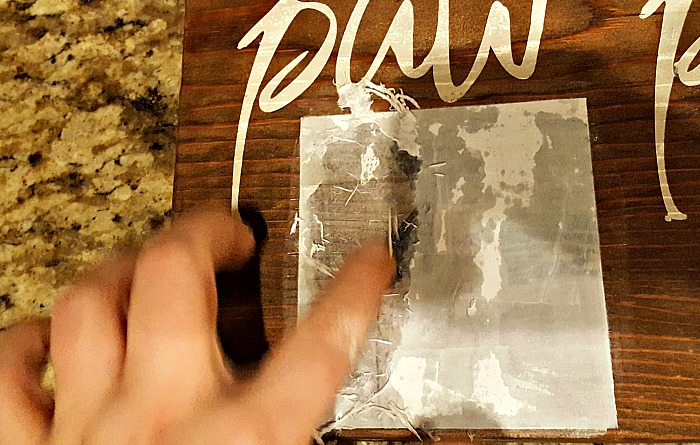
It takes a while so take your time.
After you think you’re done, wait till it dries and you’ll see a bunch more white fuzzy spots. Get it wet again and wipe those away.
Sometimes you need to repeat this process several times to get it all off. I rubbed a bit too hard in a few spots but it kind of added to the aged look!

That’s it! After it dries you can add a layer of regular Mod Podge over it if you want.
Here mine is displayed on our family room bookcase. Now I get to see the sweet face of our beloved furry friend every day!


If you’d like to save this DIY dog signs tutorial for later, you can Pin it now if you’d like!


Thanks for stopping by! Have a great day!


