
An easy way to add personality and color to your patio is to make a Porch rules sign. Check out how to make DIY backyard signs with a Cricut and paint!
We have been caught in another heat wave here in Northern Cali. Almost 107 today and it’s the end of August!! We are ready for our cool down so we can hang out in our backyard more.
My hubby and I have been busy this summer making our backyard patio into a place that we would love to hang out. We got new furniture, put up some cute lights, took down our pool fence and I made a few bar tables to add extra entertaining and storage area.
The last piece of the remodel was to come up with some outdoor decor. I have always wanted a cute backyard patio sign so I whipped this one up with a few sayings that were perfect for us.


It’s really an inexpensive way to add a personal touch and some color to your patio. So keep reading to learn how to make some outdoor signs for a patio!
Materials Needed for DIY Patio/Porch Sign
Disclosure: This post contains affiliate links from Amazon and/or Cricut.com. I receive a small commission at no cost to you when you make a purchase using my links (purple text).
- Wood – I used 1×6 for the top piece, 1x2s on back side, and then a combination of 1x3s and 1x4s for the rest. It was really whatever scraps I had on hand.
- Paint – I used chalk paint and spray paints. I prefer working with chalk paint but I had the other colors on hand
- 631 vinyl or contact paper
- Transfer tape
- Blue Tape
- Wood glue
- Nail Gun – not necessary but goes much quicker!
- Cricut or stencils – If you’d like to cut out my Ultimate Guide of Cricut Ideas click here!
How to Design DIY Outdoor Patio Signs
For this project, I used contact paper for my stencil but every time I do that I tend to fight with it a little to get it to stick. It doesn’t stick down as well as the vinyl but it’s a lot cheaper for the amount I needed. I just got a $2 roll from Walmart.
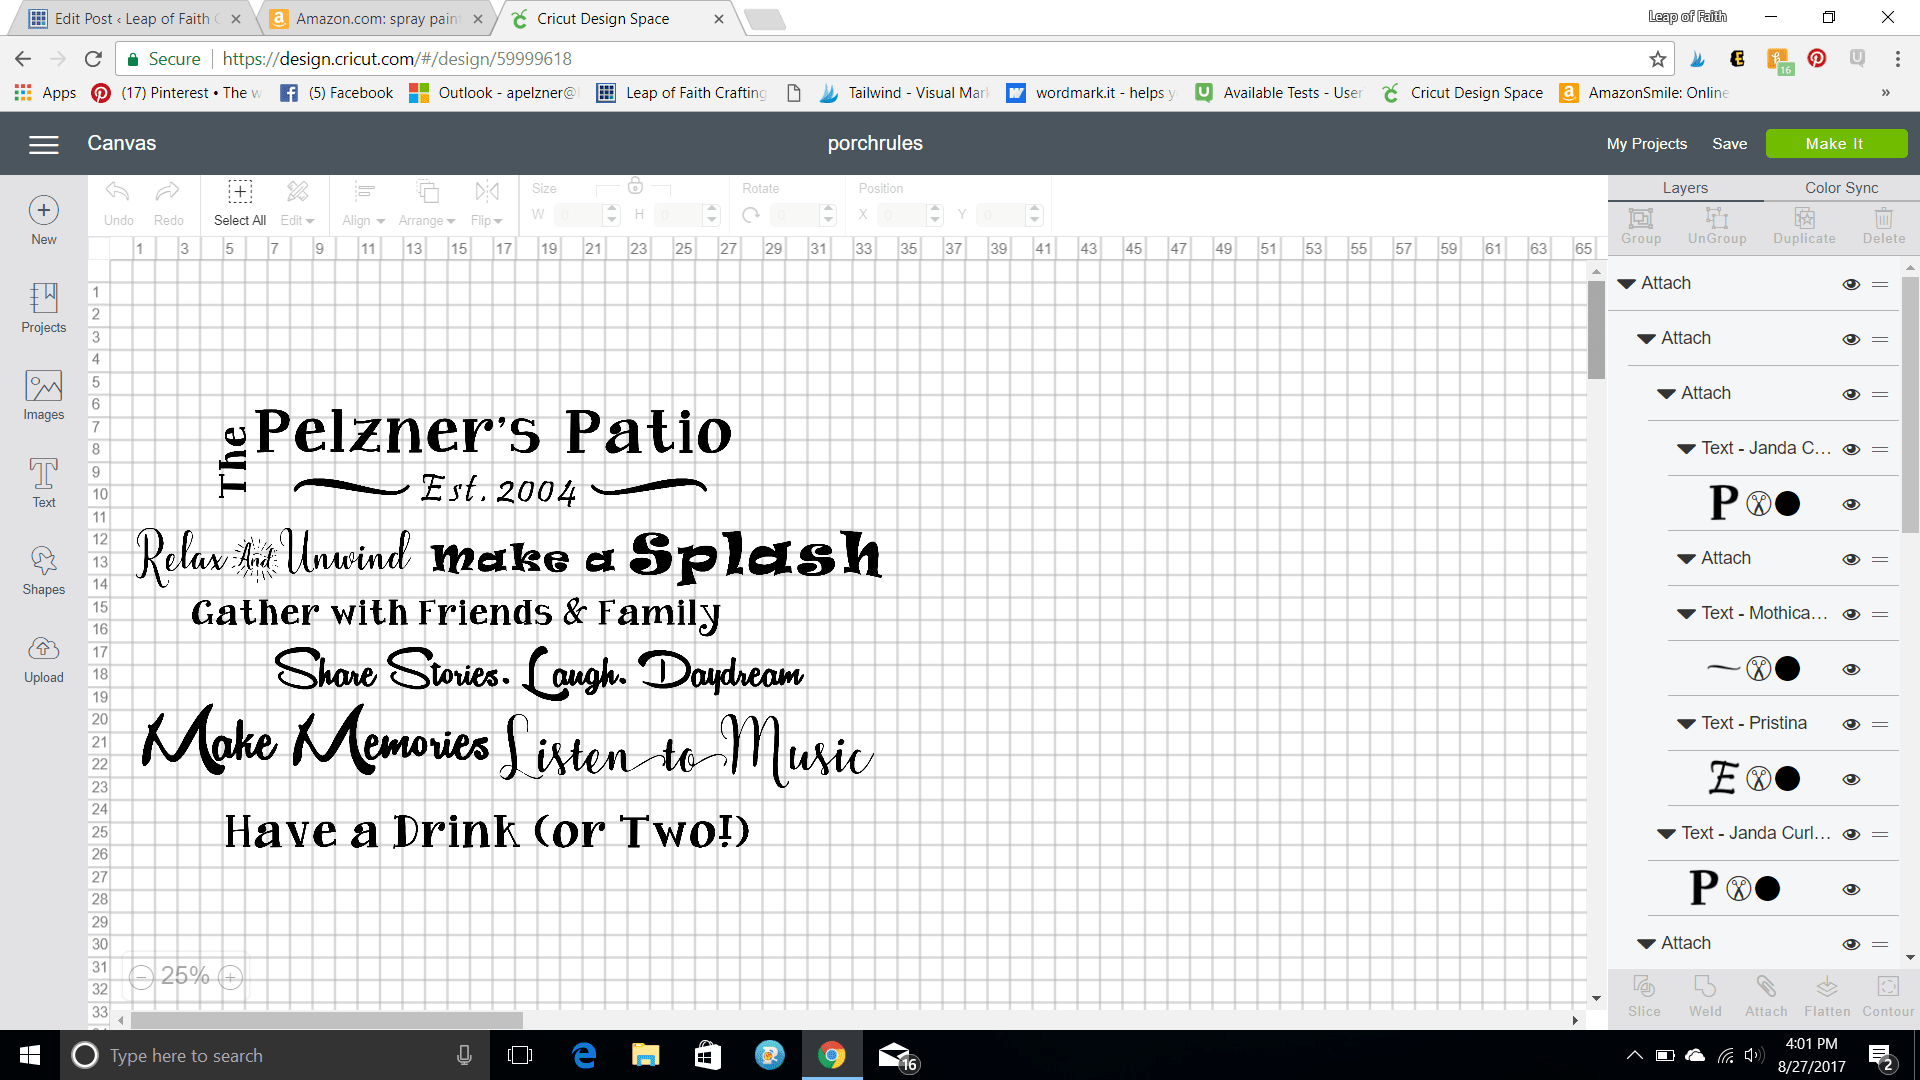
To find the design, I looked on Pinterest for inspiration and found some patio quotes that I wanted. Then I designed it myself in Cricut Design Space.
If you are new to CDS, make sure to check out my series of Cricut Design Space 101 tutorials to get started.
I made all of them less than 24 inches so I could get each phrase on one mat. This is what my CDS looked like when I cut it.

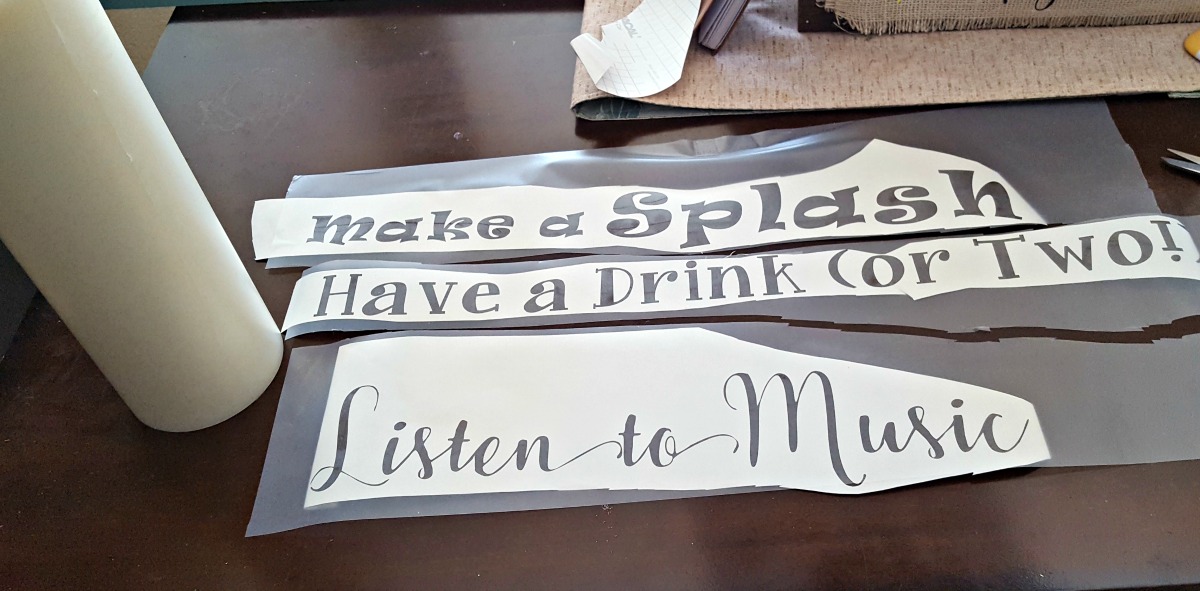
Cut all the contact paper or vinyl out with a Cricut or other cutting machine and weed it. I’m using the same PVPP method I used on my laundry room sign which has a bit more detailed information in that post.
For the boards, paint them whatever color you want the words to be. I painted 2 -3 boards each of the same color.
I used cream, blue, and yellow for this part. (*Tip – I wish I would have done all the bottoms with chalk paint. The contact paper sticks easier to it. I just used spray paint I had on hand and some of them were Satin finish which the vinyl doesn’t like to stick to!:( Live and learn, right??!!)


Once they are dry, apply the vinyl to the boards. Apply transfer tape to the top and scrape it down well.

Line the words up up where you want it on the board by measuring and getting it centered. Then add a strip of blue painter’s tape down the middle of the transfer tape. This is called the hinge method.


Then you will lift up one side of transfer tape with wording stuck to it and cut off the bottom paper close to the blue tape.

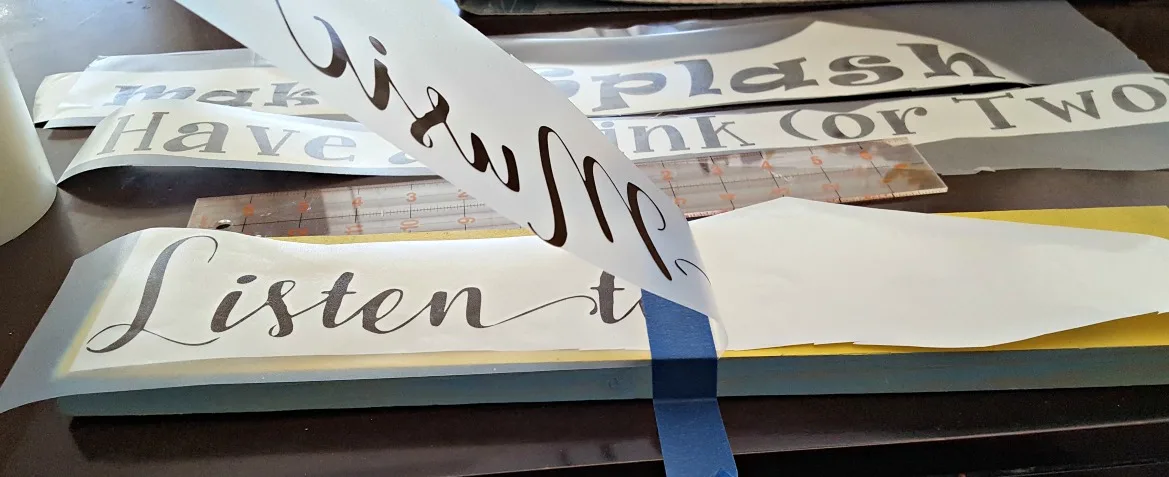
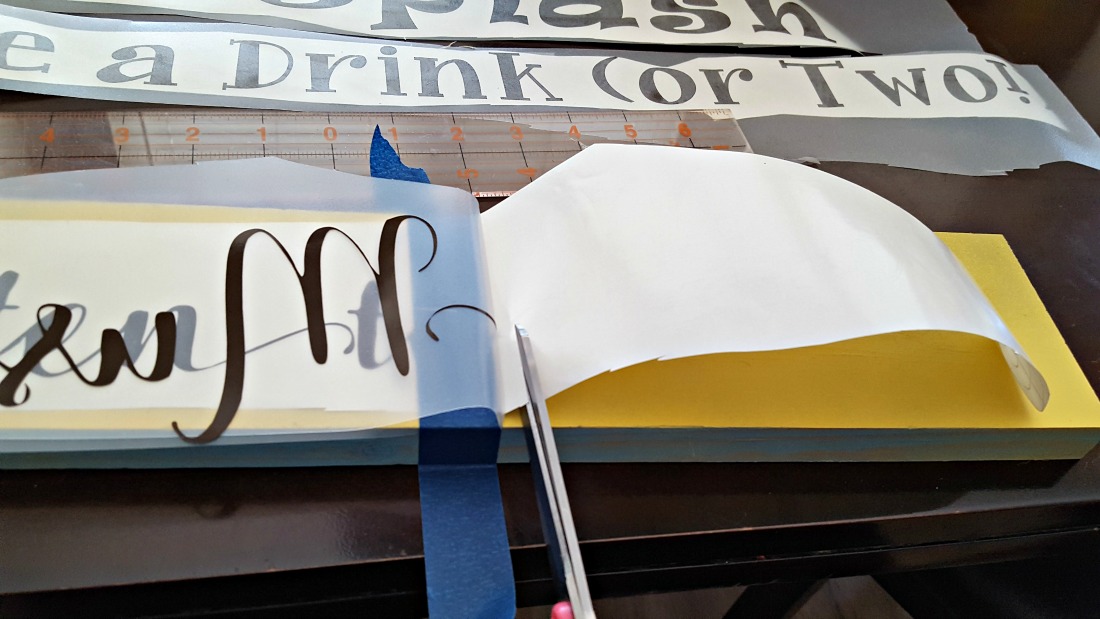

Then lay the transfer tape down on the board and smooth it down with a scraper.

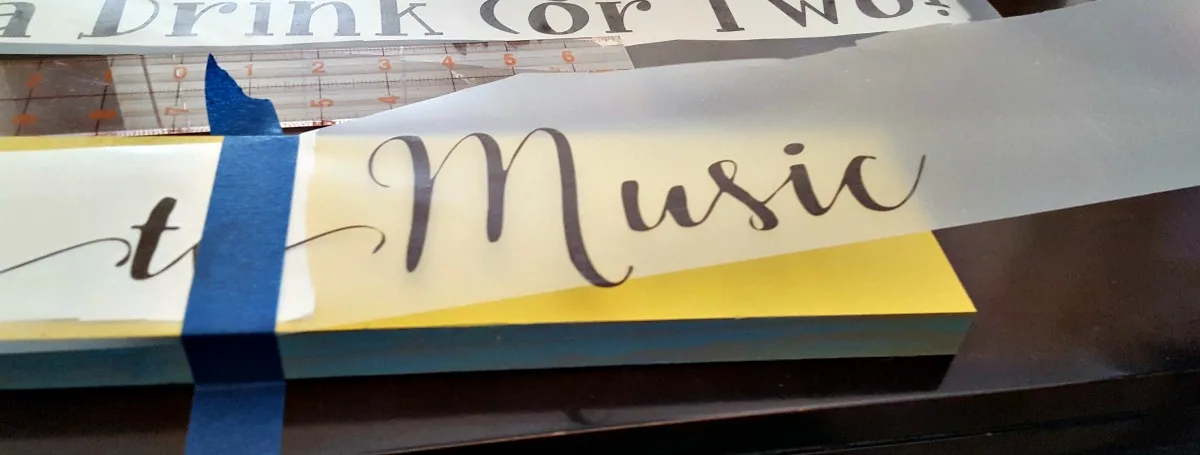


That side is now held in place. Now you can take off the blue tape, lift up the other side, take off the bottom paper and press the tape down on the board.


Scrape it down really well. Then you will start lifting up the transfer tape. You might have to scrape as you lift. If you use chalk paint, it should stick pretty easily without much fight.


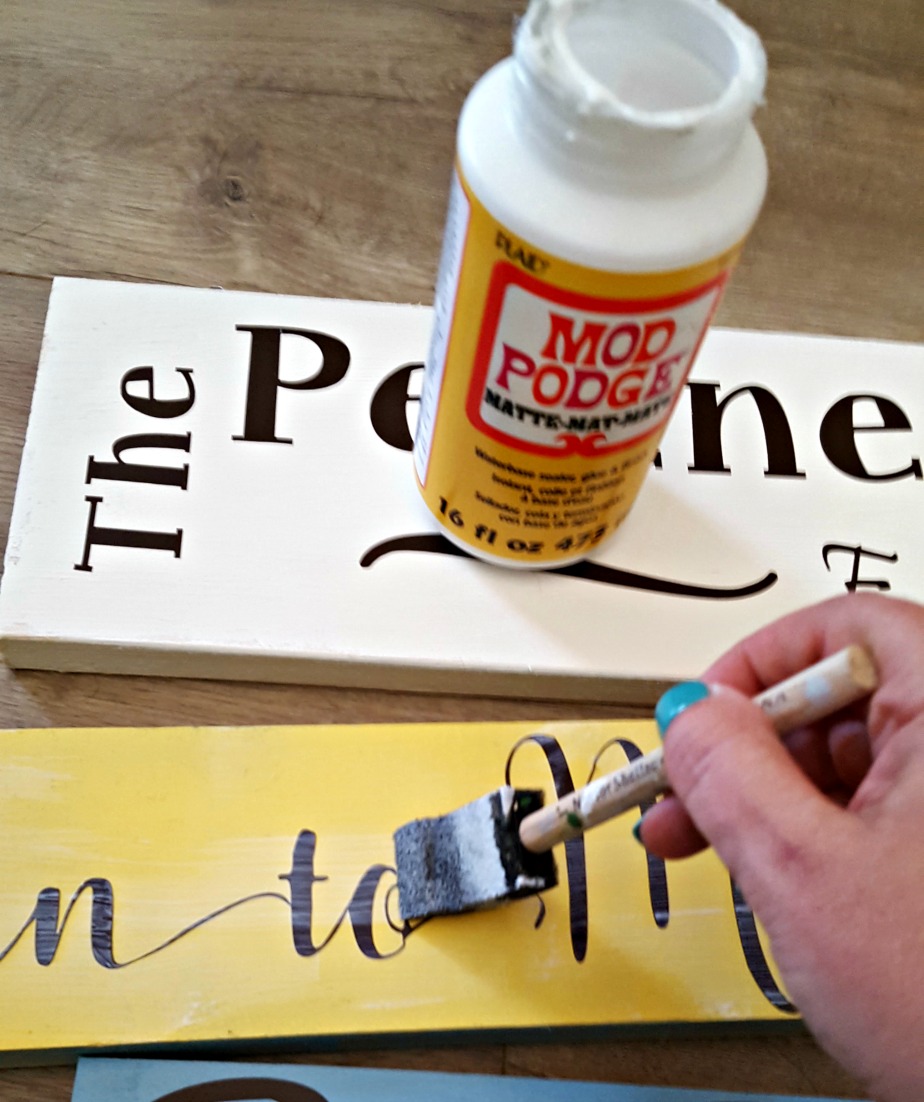
To reduce the amount of paint bleeding underneath, paint a thin coat of the same color paint over the vinyl lettering. Or you can apply a light coat of mod podge if you used spray paint like I did.


Allow the boards to dry. I moved them around to see where I wanted them to go and then I could tell better what colors I wanted to put on top.


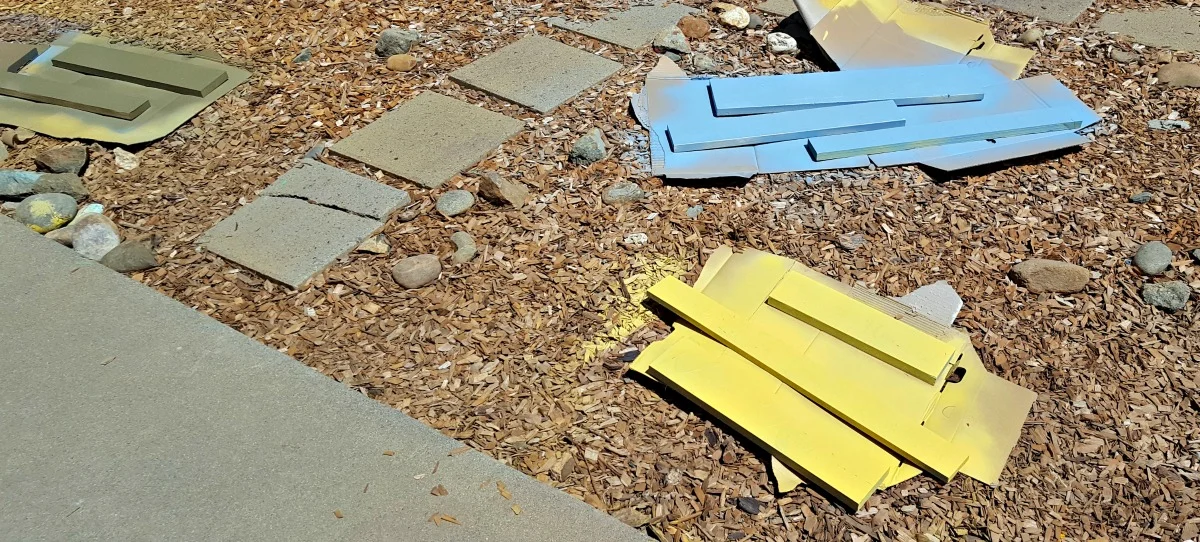
Then I spray painted the tops and sides of them with the top coat color I wanted. (*Tip – don’t do this when it’s really hot and leave them out in the sun like I did:(
The contact paper started sticking too much and I had to fight with it to get it off!)

Let them dry to the touch and then you can start peeling the vinyl or contact paper off. You can use a weeder or utility knife to get up the edges.
Just try not to scratch the paint too much. You can do touch up wherever is needed afterward though!


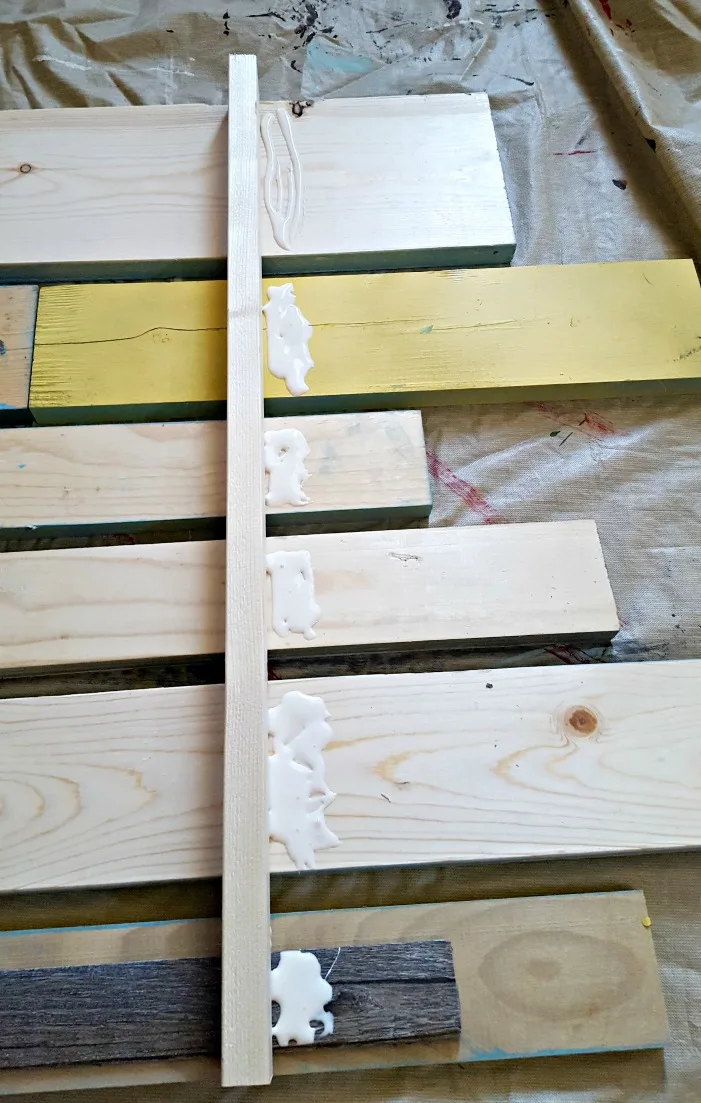
Now comes the time to put the boards together! Arrange them how you want them and then measure down the vertical length. You can push all the boards together or leave a little space between the rows as I did. Play around with it and see what you like!
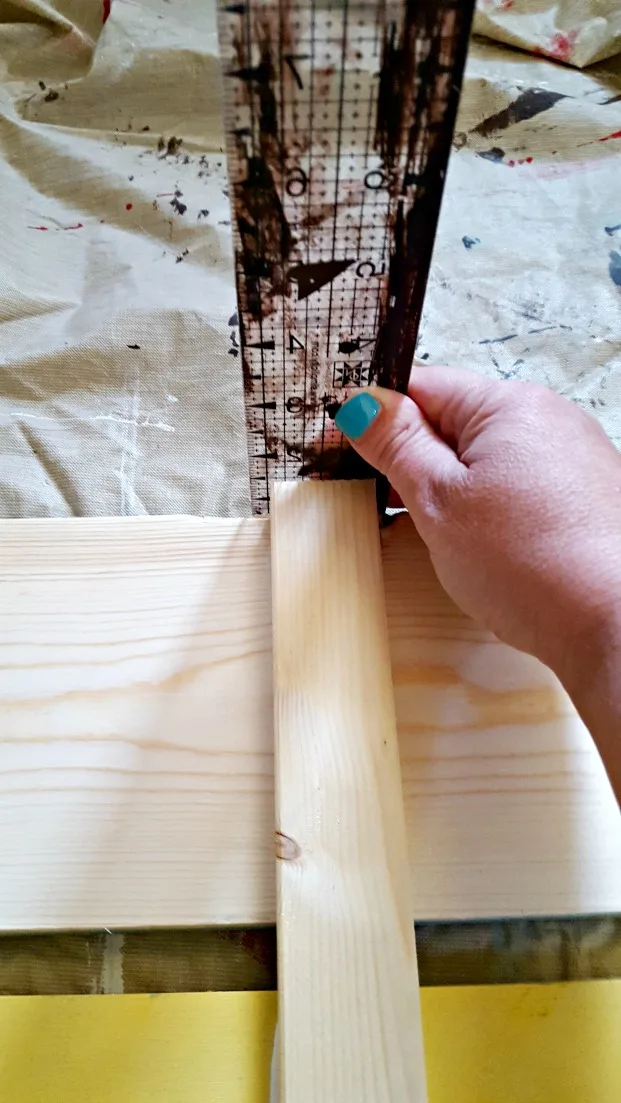
Cut two 1x2s the length to fit all the boards. Flip all the boards over. (Make sure to put a towel or something down so you don’t scratch them!)

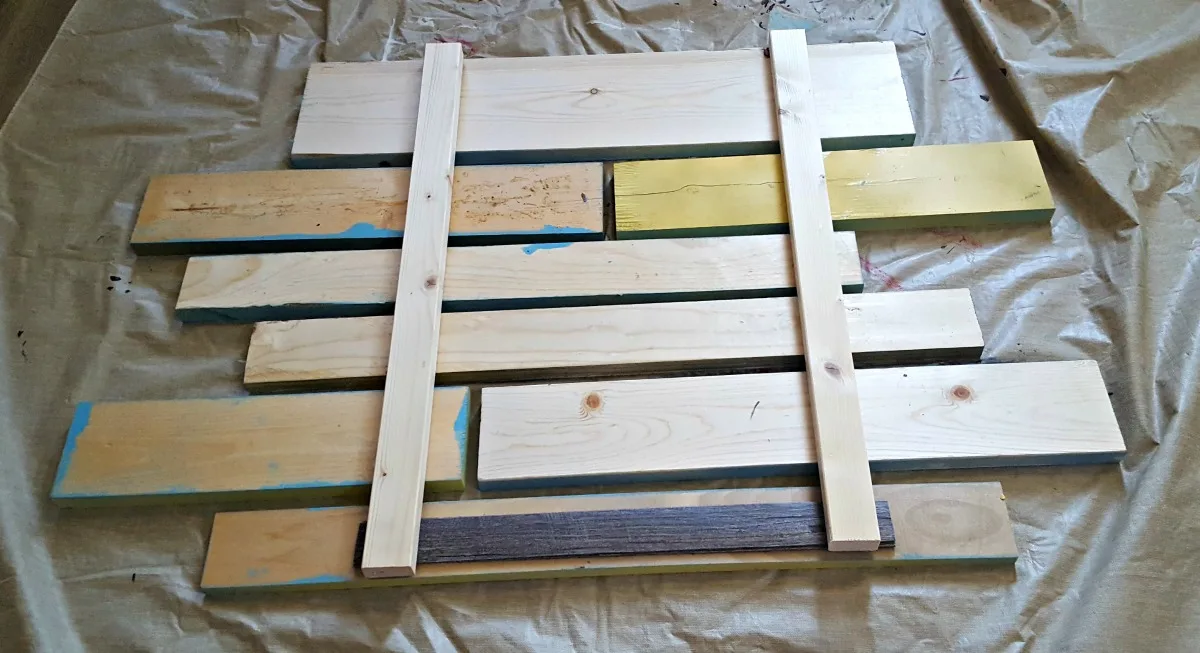
To get the boards of the patio quotes boards straight, I put a ruler at the top to make sure the 1×2 was flush with the top board and then make sure it’s flush with the bottom board.
Then I just eyeballed the boards in the middle in making them parallel and straight to the top board.

Then apply some wood glue.

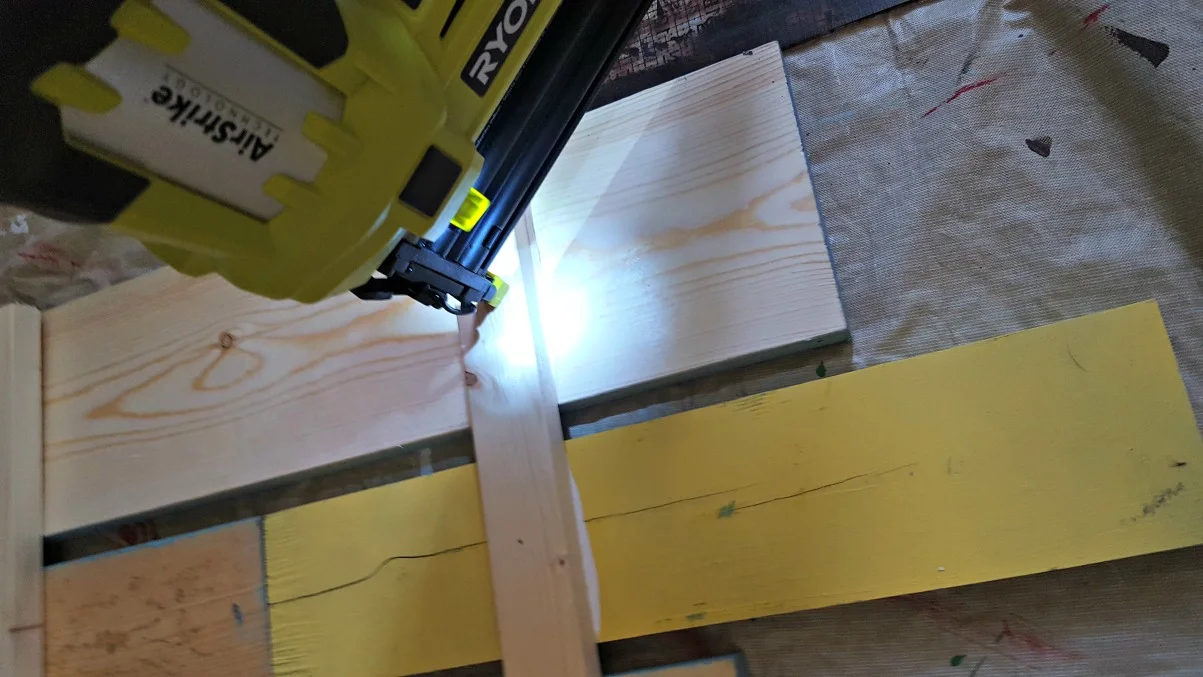
And nail the boards on for extra strength. If you have a nail gun (click here to see the one I love!) this part goes really quick!


That’s it!! I sprayed on a few layers of spar urethane to give it extra protection against the outside elements. Add a couple of sawtooth hangers on the back and hang it in your favorite spot and enjoy!


I put mine right above a bar I made out of pallets. Click here to check out my tutorial on how to make these super easy and cheap bar/counter.
Update: I now have a Porch Rules SVG file that you can use (use link).
Now, all we need is some cool fall nights to enjoy the backyard!! I’m so excited for roasting s’ mores and watching movies with my kiddos!
Now that you know how to make DIY patio signs, you can make one for any room in the house or for gifts!


Do you have any other patio sign ideas??
Thanks for checking out my blog! Have a great day!


Cecilia
Sunday 17th of May 2020
Please help Can you tell me where to get the svg file for the Porch Rules sign? I love it. Thanks in advance. Blessings
Leap of Faith Crafting
Sunday 24th of May 2020
Hi Cecilia, I actually just made it with different fonts I had in Cricut Design Space so there is no file for it. Sorry! I will add it to my list to make though!
Sherry Clement
Sunday 10th of September 2017
I want one too! How much?