
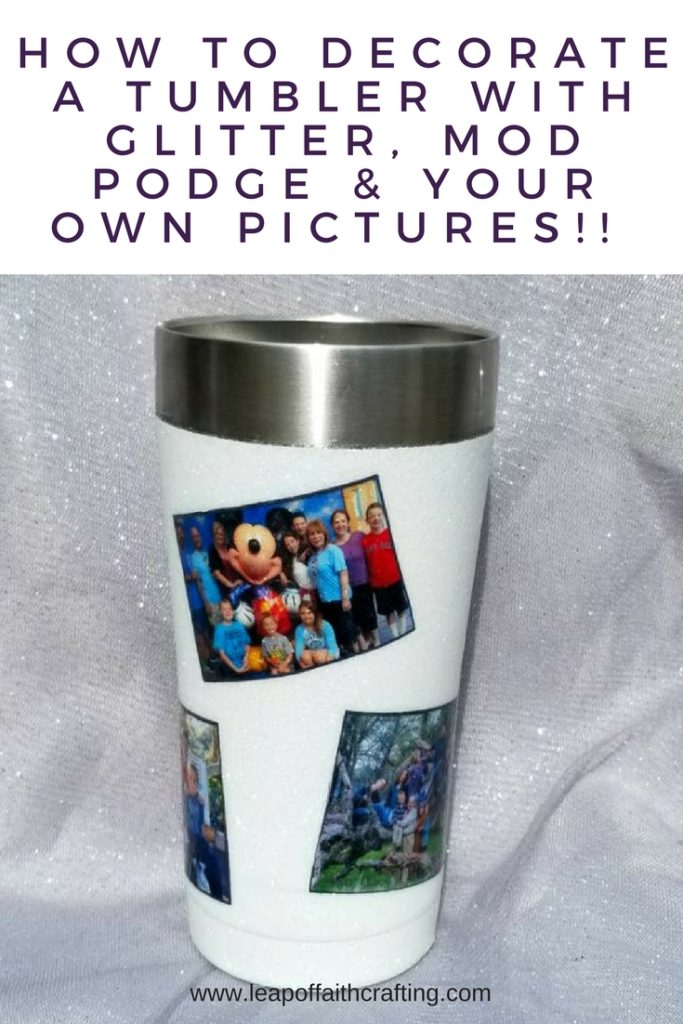
Learn how to make a personalized decorated yeti cup or any other stainless steel tumbler by adding water slide decal pictures to them.
Hi Friends! I have another glitter tumbler tutorial for you today but this time I tried something different – Mod Podge instead of epoxy!
I wanted to see how a tumbler with mod podge would hold up since it is much cheaper and easier to make than the epoxy.
I also wanted to show you how to make a decorated yeti cup or Ozark tumbler or any stainless steel mug using your own pictures.

So you don’t even need a cutting machine to make a personalized tumbler (but I still recommend getting one because they are SOOOO awesome!! You can read all about all the amazing things you can make with a Cricut here).
Materials for Decorated Yeti Cup / Stainless Steel Mug
Disclosure: This post may contain affiliate links from Amazon. and/or Walmart. I receive a small commission at no cost to you when you make a purchase using my link.
- Stainless Steel Mug of your choice – I like Ozark Tumblers or Mossy Oak
- Mod Podge – gloss
- Water slide paper – I use the inkjet one since that’s what kind of printer I have!
- Crystal clear enamel – I got mine at Wal-mart
- Extra Fine glitter of your choice – I used white so the pictures would show up better
- Wet Sand Paper
You can always browse my Amazon storefront with my complete DIY Tumbler supply list.
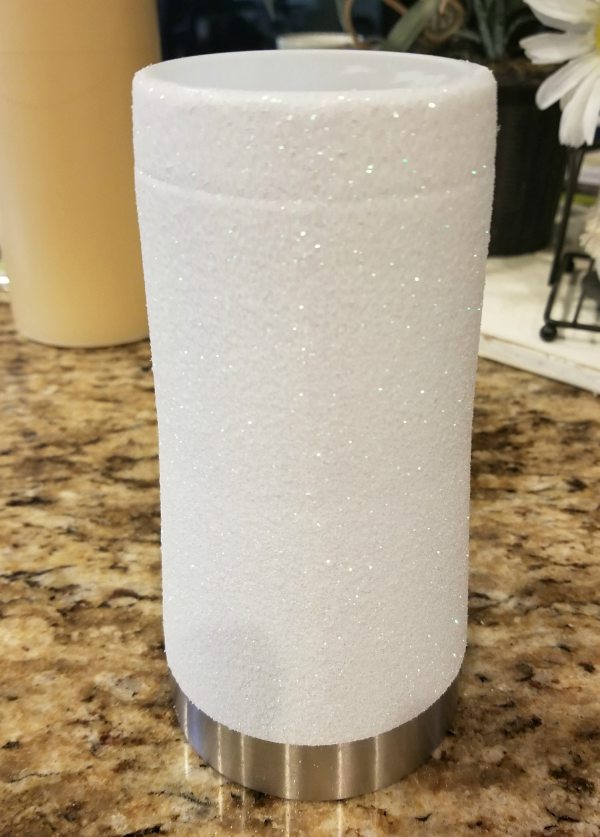
Painting a Tumbler Mug
The first thing you’ll want to do is paint your tumbler. Put a piece of painters tape around the top rim. (If you’d like to watch a video on how I apply tape to a tumbler click here.)
I tape off the top of my tumblers so my mouth doesn’t touch the mod podge or glitter part.

I use spray paint (Rustoleum gloss protective enamel) instead of using 2 or 3 layers of glitter but that’s a personal preference. I just spray the upside-down tumbler as I walk around it about 4 times.
If you’d like to see a video of how I paint a mug with a turntable click here.

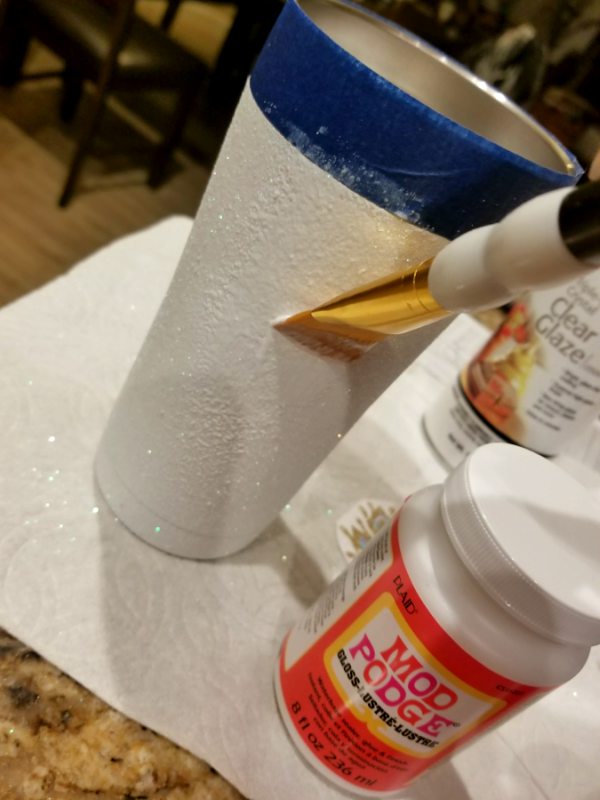
Using Mod Podge on a Tumbler

Once it’s dry, apply a smooth layer of mod podge and then start pouring on glitter all around the cup so that it’s fully covered.


If you’d like to see a video of applying the mod podge glitter, go to my tutorial by clicking here.
Remove the tape and let the cup dry upside down.
Once it’s dry, tap the cup to shake off any extra glitter and use a dry paintbrush to also remove the extra glitter by sliding it down the cup all the way around.

Apply tape again to the top rim and then apply a layer of gloss Mod Podge like you did before and let dry.
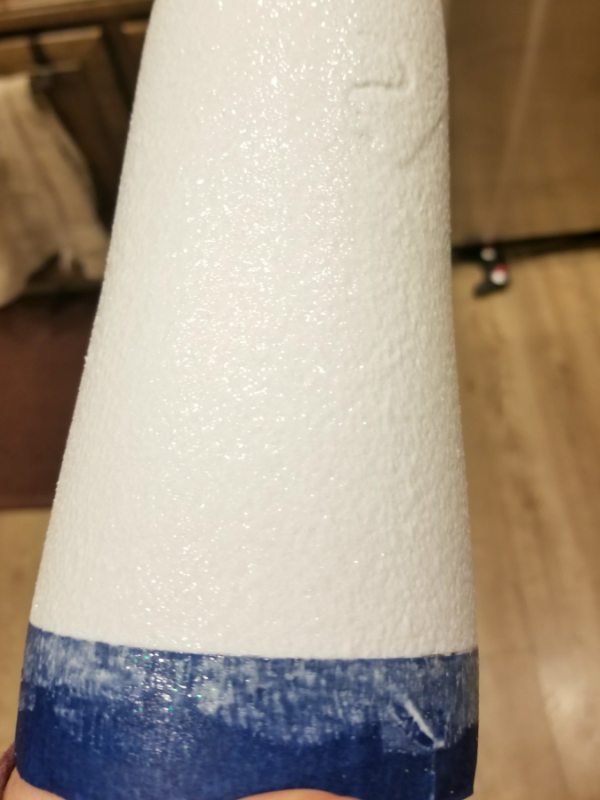
Remove the painter’s tape so it doesn’t dry with the glue on it, which makes it harder to come off.
Once it’s dry, sand it with wet sandpaper. Spray the bottle with water and then gently sand it up and down to make smooth. (I found the wet sandpaper in the automotive department of Wal-mart)

Prepare Pictures to Add on Tumbler
You can prepare your printed decals at any point during your drying times. (Check out my post here on how to design water slide decals in CDS or google slides!)
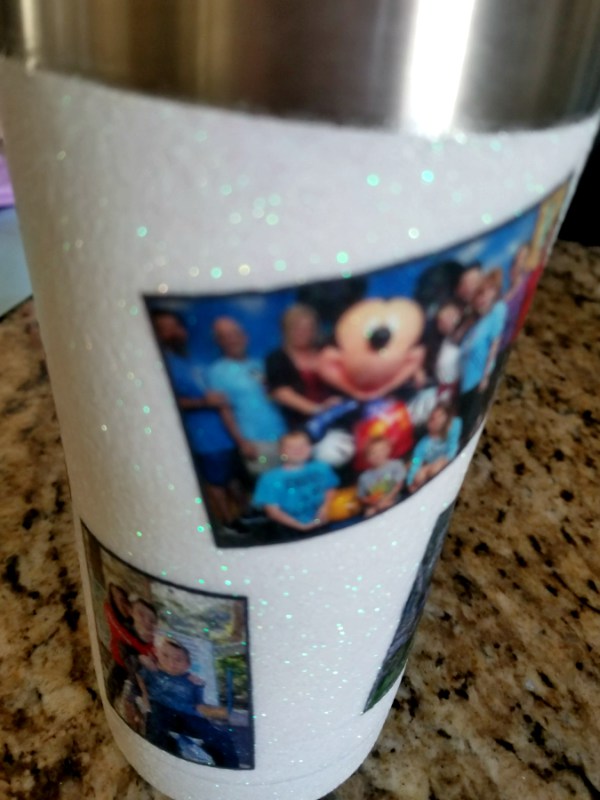
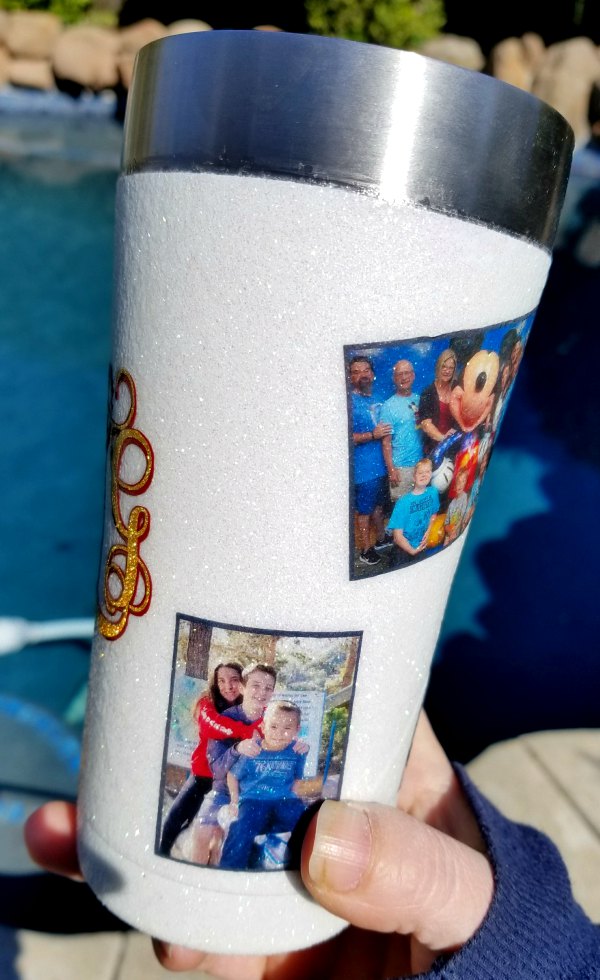
Pick out whatever pictures you want, size them, then print them on the glossy side of water slide decal paper. Or you can use a Cricut print then cut feature.
Let them dry and then spray a layer of crystal clear enamel over all the pictures. Let them dry for 30 minutes or so and spray another layer.
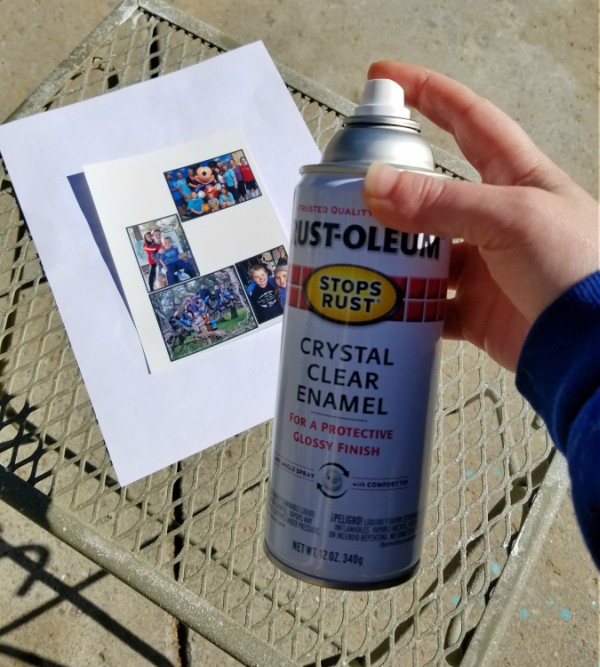
Repeat for the third layer and then let them completely dry and then cut them out.
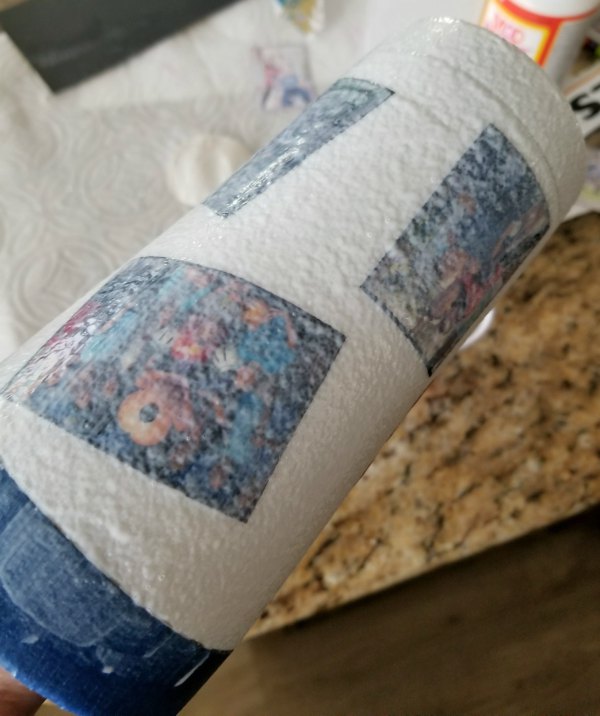
It’s super easy to attach the water slide decal paper to your decorated yeti cup. Make sure to watch the video on the top or side to see it in action!
After I applied them I added another layer of the gloss mod podge to just the pictures.
On the other side, I added a shadow layer Monogram cut with my Cricut. Check out my video tutorial here on how to make a shadow layer for text!

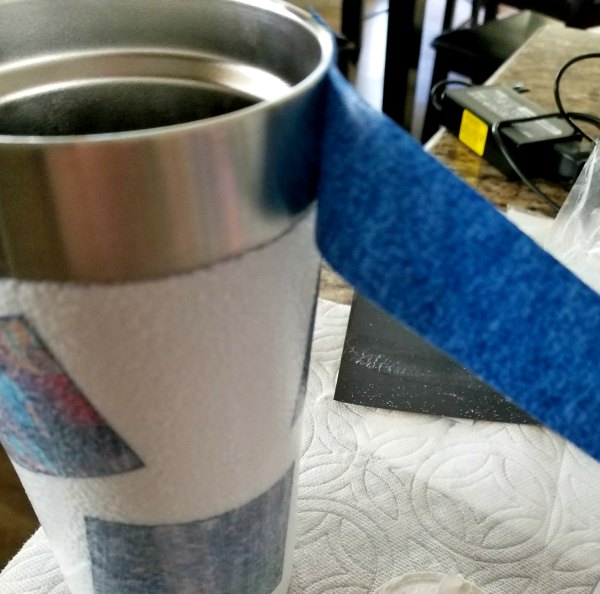
Once everything is dry you’ll need to add another few layers of gloss mod podge about 30 minutes apart.
Apply the tape a mm or two above your glitter line so that you seal the glitter edge.
I’d love if you come craft with me on Instagram! I post a ton of short video tutorials on all sorts of different DIY projects. Click the button below!

I also added a layer of this gloss glaze spray to add extra gloss in between the layers of mod podge but this is an optional step. Remove the tape before the final layer of mod podge dries.


There you have it! A way to make a decorated Yeti cup or Ozark tumbler without having to use epoxy.
As you can see from the pictures, it’s not as smooth as epoxy but it still works and actually has a nice texture to it!

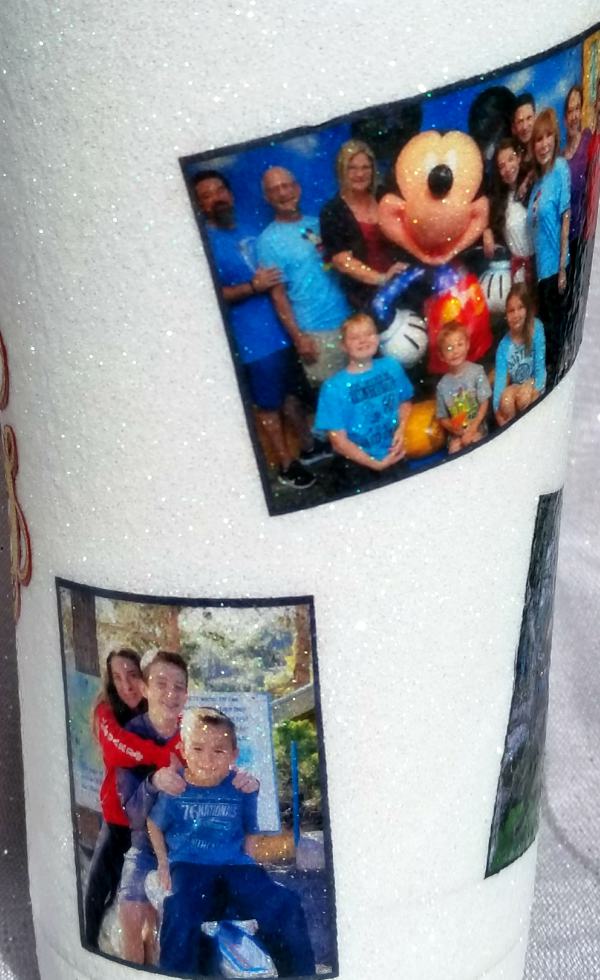
The photos are blurry in this picture because I was trying to get a good pic of the sparkles in the glitter!


Another way to add waterproof pictures to a tumbler is by sublimating a tumbler blank.
Make sure to check out my post here on how to epoxy glitter tumblers. It’s not as hard you might think!
Also, if you want to see my complete guide to personalizing tumblers from beginner to advanced click here!
Thanks for stopping by and have a creative day,


Amy
Monday 14th of October 2019
Is the epoxy dishwasher safe? I know they should be handwashed but would anything happen if they were put in the dishwasher? Also what are the most economical cups to use? Thanks
Heather
Friday 17th of July 2020
No they should be hand washed
Leap of Faith Crafting
Tuesday 15th of October 2019
Honestly, I don't know for sure, but I don't think so. Some of them are FDA compliant to be around food but I can't find anything that says it is dishwasher safe. I generally use tumblers I find at Walmart or sometimes Costco. I think they all perform about the same!
Morgan Plummee
Wednesday 2nd of October 2019
If I am using a vinyl cut out (instead of the pictures) would I have to use the enamel or could I only seal with mod podge?
Leap of Faith Crafting
Tuesday 8th of October 2019
If you are just using vinyl, you probably don't even need to seal it! I've done it both ways. Permanent vinyl is pretty good about not peeling as long as it's not too intricate of a cut. I've also sealed it with Mod Podge and it works too but you'll see that sheen of the mod podge over it.
Heaven
Sunday 29th of September 2019
Do you have directions on how to make this picture tumbler with expoy instead of mod Podge?
Rose
Monday 26th of August 2019
I am making a glitter tumbler with DISHWASHER SAFE Mod Paudge. What I want to know and can't find anywhere is if anyone has used epoxy over it or if it is necessary to make it dishwasher safe using glitter and a decal on the tumbler with the Dishwasher Safe Pod Podge?
Leap of Faith Crafting
Tuesday 3rd of September 2019
I wouldn't advise putting any stainless steel tumblers in the dishwasher no matter what you have on them. It's actually the tumbler itself that should not be in the dishwasher. There is some kind of coating or material on the inside that keeps everything cold and the dishwasher messes with that. Sorry I couldn't answer your question!
Julie
Sunday 21st of July 2019
Hello, I have tried using Modge Podge to help seal an acrylic paint on wine glasses. The Modge Podge came off along with the paint when I attempted to hand wash them. How are you able to wash them without everything coming off the tumbler?
Brandi
Friday 11th of June 2021
@Julie, Also be sure to allow the mod podge to cure a full 28 days before washing or doing any of these things as well because that can have an impact on the sealing process itself!Also try using the Hard Coat Mod Podge & the dishwasher safe one even thought you wont be placing in the dishwasher it still adds that extra protection I use both when doing anything with glassware when using Mod Podge products! Hope this helps!
Leap of Faith Crafting
Wednesday 24th of July 2019
How many layers of mod podge did you use? You might also want to use a spray sealant before applying the mod podge on top. I've never had any issues with the paint coming off beside one time a stemless wine glass sat in water overnight and it stretched the paint a bit but still never came off. Also, make sure the Mod Podge cures for over 24 hours (I'd say 72 for sure) before you get it wet. Hope that helps!