
I followed Ana White’s DIY farmhouse table plans to build our new dining room table!
Part of my dining room makeover was figuring out if I even wanted to have a dining room table. We rarely eat in the dining room and most of the time my craft stuff ended up all over it.
In the end, we decided to sell our table and hutch and that I would build a DIY farmhouse table.
Of course, I scoured Pinterest and in the end, I built this beautiful table with Ana White’s free plans inspired by a ZGallerie table. I absolutely love how this grey farmhouse table came out!
It looks amazing in my new dining room. To check out my post on my dining room update click here.

This bad boy was a labor of love and I have a nasty bruised big toe to prove it! I’ll pass on some free advice… this is heavy!
Do not be impatient like me and try to move it by yourself. I tried to flip over the tabletop and it landed on my big toe… ouch!
Ana White Farmhouse Table Plans
Check out Ana White’s free plans here to get the full tutorial! She has so many amazing plans on her site, so you’re welcome if you’ve never checked her site out before!
You can find the plans for Ana’s happier homemaker bench that I used for the benches by clicking here.
Building a White Farm House Table
Disclosure: This post contains affiliate links from Amazon. I receive a small commission at no cost to you when you make a purchase using my links (purple text)
If you haven’t used a Kreg Jig before, don’t be scared, it is super easy! It allows you to make pocket holes quickly and easily. Then you attach the boards together with pocket hole screws. You can get one for $40 on Amazon by clicking here.
I just use a regular clamp with it. Since all the wood I was working with was 2 inches thick I didn’t even have to change the setting.
Just clamp it on, drill a hole, loosen, slide down board about 6 inches and drill again. Repeat, repeat, repeat! That’s all there is to it!


Once you have all the pocket holes you attach the boards together with pocket hole screws found here.

I actually love these screws. They screw in so easily that I use them for when I’m drilling straight in like on the legs of the table.
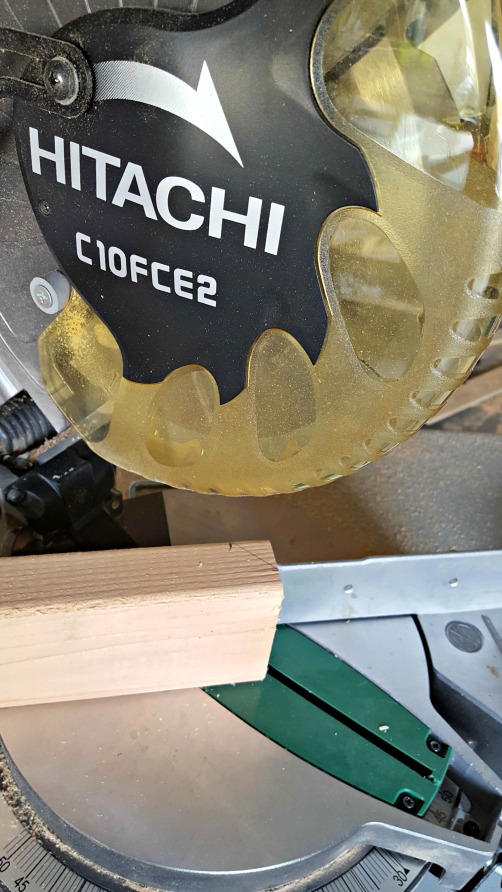
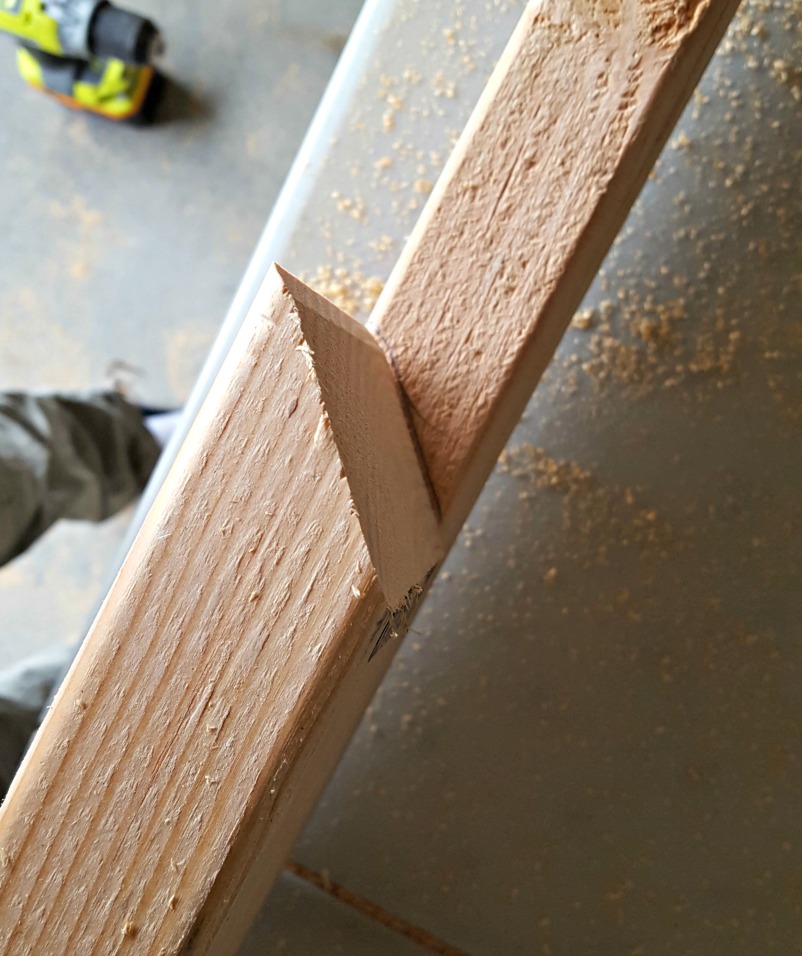
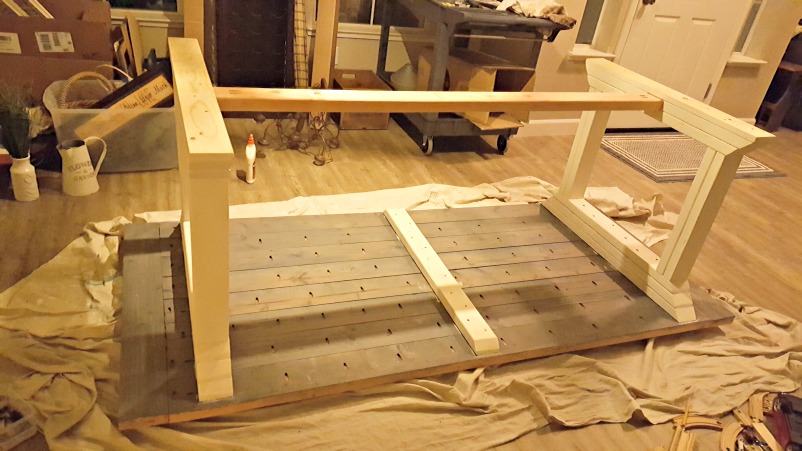
Cutting the Legs of DIY Rustic Table
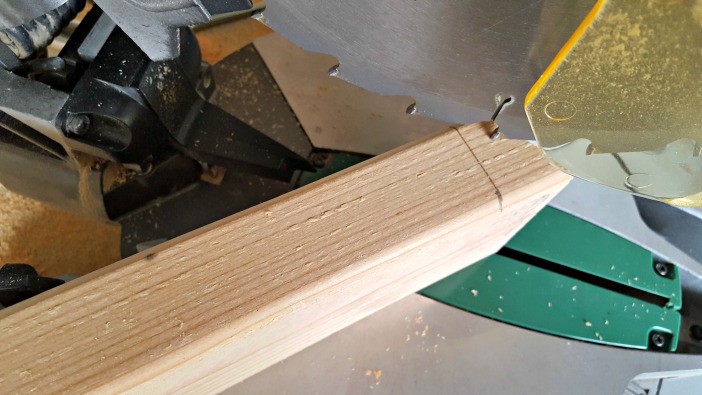
For the table leg beveled edges, it was a bit tricky. You need to cut the 2x4s on the side. Cut one side at 30 degrees then measure 38 inches (or whichever length cut you’re on) and cut the other end at 30 degrees (not parallel ends!)
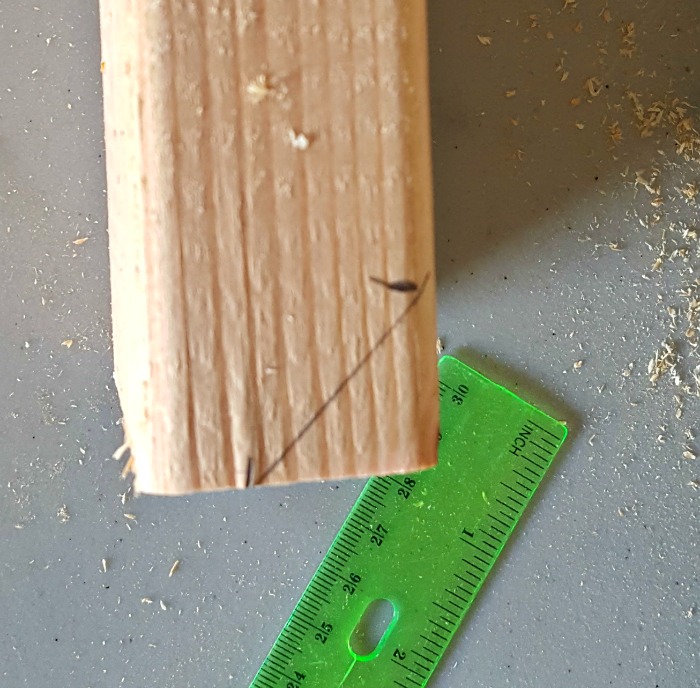
After the first cut measure 1 1/4 inch from the long point and draw a line. Then change your miter saw to 45 degrees and cut the small part off.


Then for the other 2 cuts, I laid the first one on the top and traced it.


I’d love if you come craft with me on Instagram! Click below to follow. Also, if you make any of my crafts I’d love to see them!! Tag me @leapoffaithcrafting.
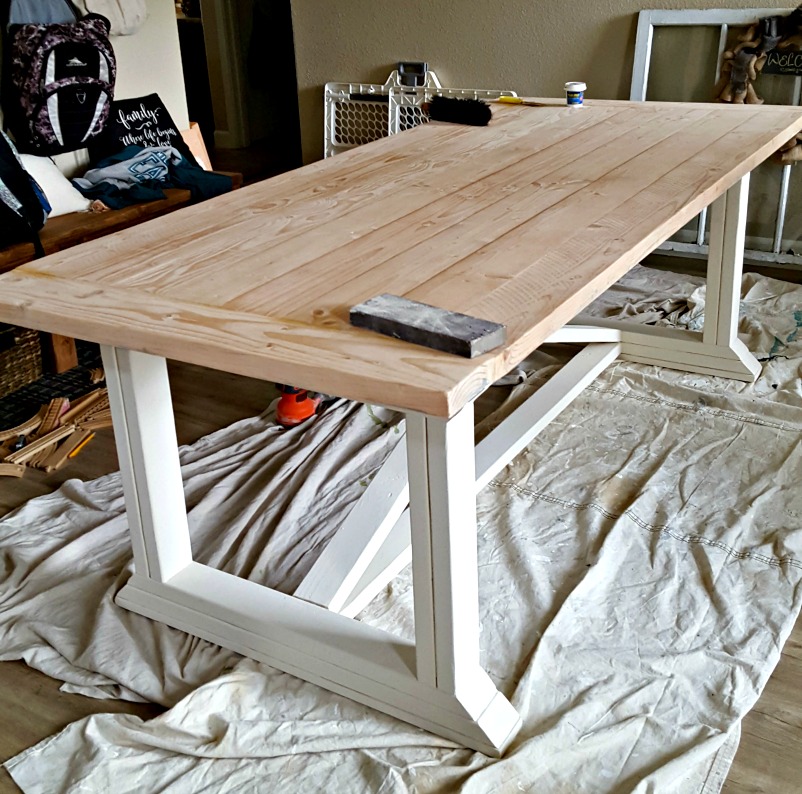
Preparing to Paint a Grey & White Farmhouse Table
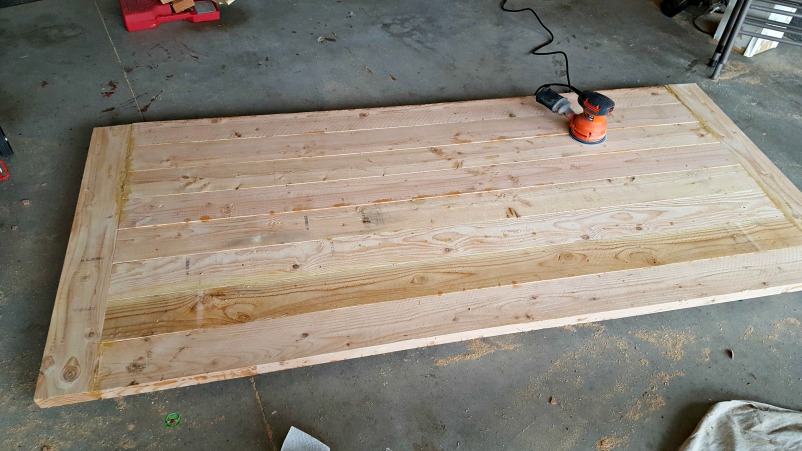
I sanded the top down in my garage with 120 grit and then 220 grit with my orbital sander. I put the legs together, the top together, and then moved them into my dining room to put them together.
Finishing the White & Grey DIY Farmhouse Table
I really wanted to lighten up my room by having a partial white farmhouse table. So, I painted the bottom half of the table with Renaissance Chalk Paint in Ivory Tower. You can find it here on Amazon.
I lightly sanded with 220 grit in between coats and sealed it with 2 coats of polycrylic (found by clicking here).
For the tabletop, I wanted a more farmhouse table grey look. So, I started by brushing on a coat Minwax Wood Conditioner (find on Amazon by clicking here).
After that dried, I applied a coat of Minwax Dark Walnut Stain. I brushed on a coat with a brush and then wiped off the excess with a cotton shirt.
I then added a coat of weathered grey on top of it, let it sit for 10 minutes, and then wiped off the excess again.

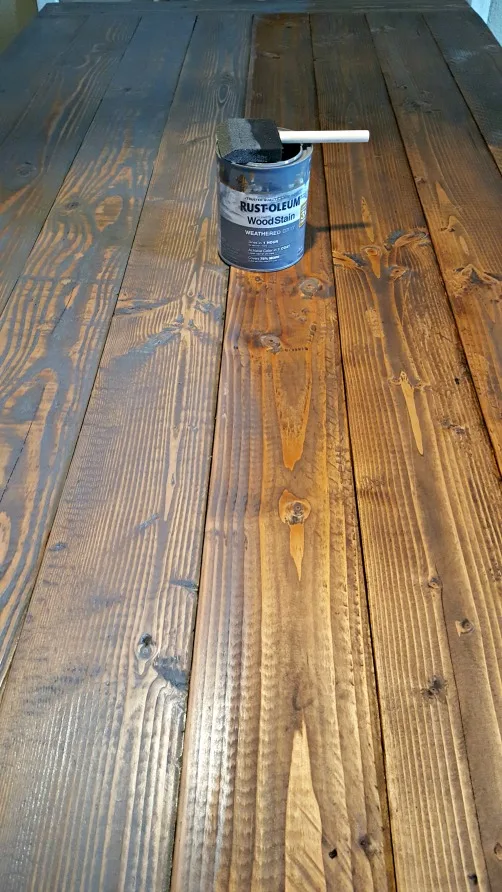
You can see the difference that adding the extra coat of weathered gray makes. The left half of the table has the gray on it and the right side is only dark walnut stain.

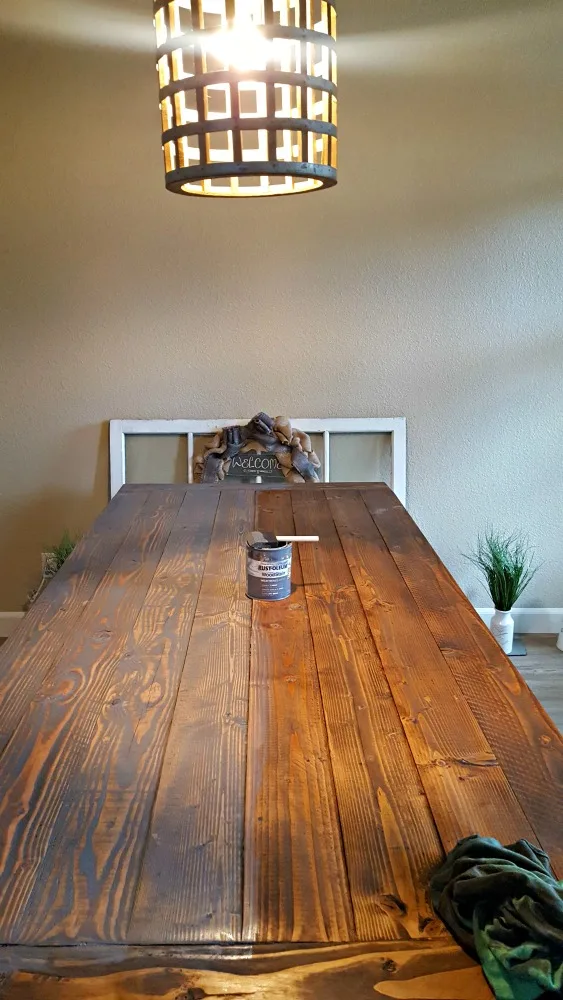
After everything was dry, I applied 3 coats of a Urethane top coat to seal my DIY farmhouse table. Whew!

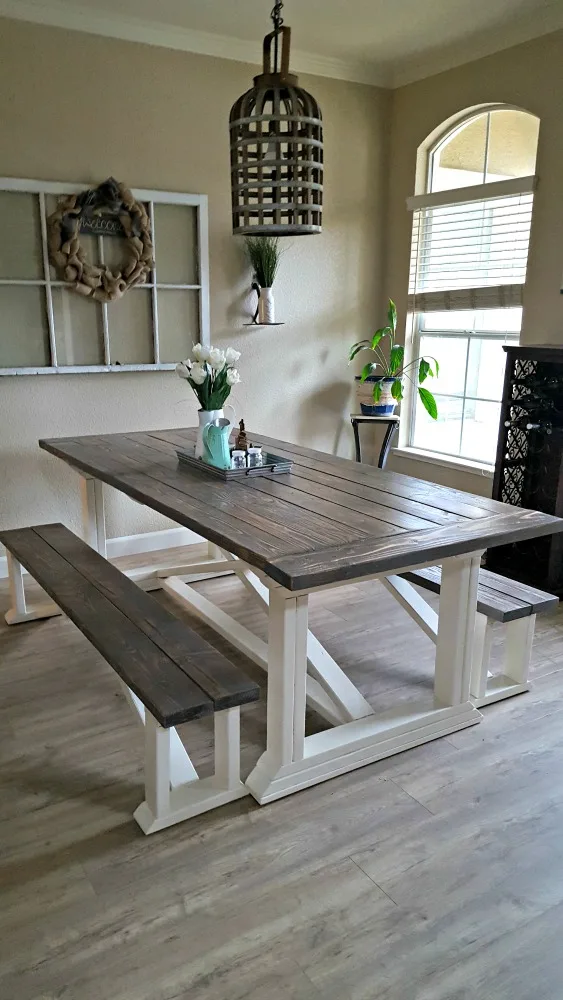
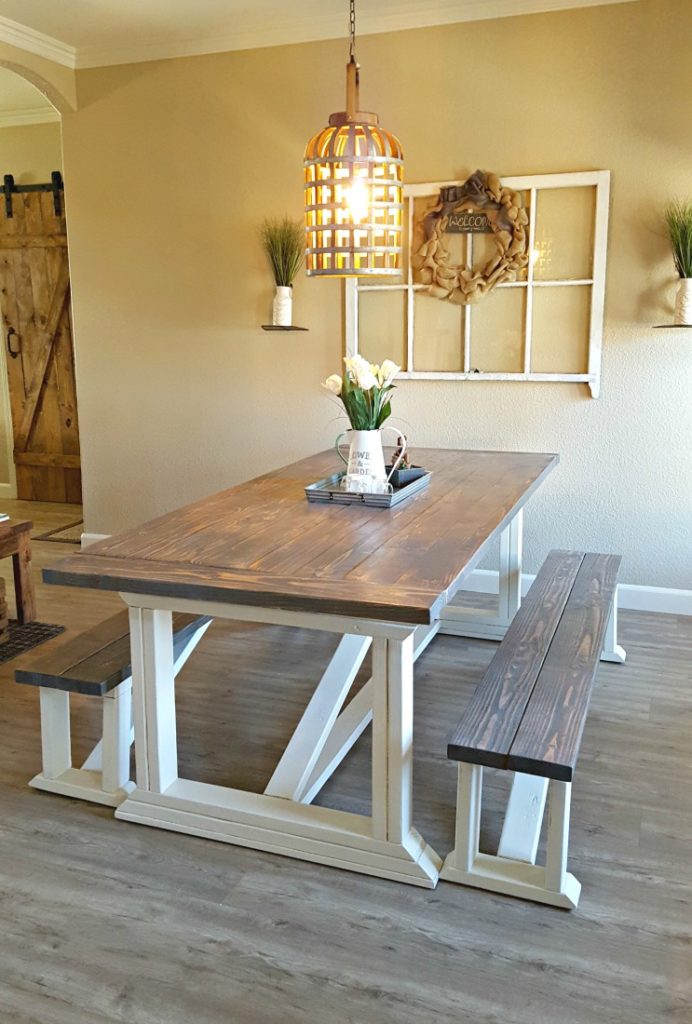
This is now my new dining room and the new grey and white farmhouse table. It’s not perfect but it’s handmade and I love it!
And it gives me a lot of space for having people over like for my ornament making party and wine and painting parties.
I also put trim around the windows which added that extra feel of farmhouse and warmth! Click here to read the full tutorial on how to make these easy farmhouse window trims!

Save this tutorial for later! Simply hover over the top left of the image below and PIN It now!

On the other side of the room, I made a super easy Shanty 2 Chic bench and mudroom wall for all my kiddos stuff! Click here to read my tutorial on how to put this mudroom wall together!
My dining room is so much lighter and brighter now, I absolutely love how it came out. It’s amazing what a difference paint and furniture makes!
Thanks for stopping by!! Let me know if you have any questions!
Have a creative day,


")
")


Megan
Wednesday 7th of April 2021
Hi, I was wondering how many people this sat when all finished! Looking for a table that sits 6-8
Leap of Faith Crafting
Sunday 11th of April 2021
We are a family of 5 and there is definitely room for 6. We have done 8 and will even sit people on the ends!
nina
Wednesday 29th of April 2020
hi there, what type of wood did you use, and what places could i get them from? thanks :)
Leap of Faith Crafting
Tuesday 12th of May 2020
Hi, I was got the wood from Lowe's. Honestly I can't remember the exact name of it though, sorry!
Jasmin
Sunday 26th of April 2020
Did you change the dimensions of your table from the original plans? I know on the original plans showed 94 inches long and 44 wide. The original will wit in my dinning room I’m just thinking I might like table a little smaller.
Leap of Faith Crafting
Sunday 26th of April 2020
No, I did the same exact dimensions for the table!
Emily
Saturday 18th of April 2020
Did you put anything between the pieces of wood to prevent food getting stuck in cracks?
Leap of Faith Crafting
Sunday 26th of April 2020
No, I didn't. If you rip the boards they lay pretty flat to each other. I do have a small space in a few spots but I can scrape stuff out with a dull knife if need be. It hasn't been a problem yet!
Monica
Saturday 11th of January 2020
I have a super random question not really regarding to the table. But the shelfs that the plants are sitting on, where did you get those?
Leap of Faith Crafting
Tuesday 14th of January 2020
Hi Monica! I wish I remembered! It was from one of those sites that have items for a limited time only. I think you might be able to google "hoe handle shelves" or something and see if you can find some!