Learn how to make glitter personalized stemless wine glasses with a video tutorial! Perfect for gifts, party favors, or just for fun!
Hi Friends!! Y’all know I love my glitter tumblers and I have one more tutorial for you. I couldn’t resist making some personalized stemless wine glasses when I saw these cute stainless steel ones.
These epoxy stemless wine glasses are perfect for cocktails, white wine, or just keeping water cold. The DIY personalized wine tumbler would also make perfect bachelorette favors, birthday gifts, or just for yourself!
Make a bunch of stuff for the wine lovers in your life and put it all in a fun DIY wine gift basket!

There are endless possibilities when it comes to making personalized stemless wine glasses. You can design any saying to put on them, but if you don’t have the desire or time to do that, I have you covered!
I have SVG and PNG cut files for you of “Cheers” written in 8 different fonts. Choosing a font can be very time-consuming and it’s really a personal preference, so I made a bunch so you could choose the one you like best!
Plus I have a video tutorial for you on making this glitter epoxy wine tumbler! Taking pictures while I’m actually making the glitter stemless tumblers is not very easy, but I will walk you step by step through it.
Materials Needed for Personalized Stemless Wine Glasses
Disclosure: This post contains affiliate links from Amazon and/or Cricut.com. I receive a small commission at no cost to you when you make a purchase using my links.
- stainless steel stemless wine glass – I got this 4 pack from Amazon here
- mod podge and glitter mod podge
- spray paint – Berry Pink and Spa Blue (see below)
- matching glitter & another glitter to ombre – I used this pack of different chunky glitters found here
- paintbrushes – I like these flat ones
- epoxy – I use Alumilite brand found here
- Cricut
- Vinyl – I used holographic vinyl and regular adhesive
- Cheers FREE download – SVG click here PNG click here
Instructions for Stemless Glitter Cup
The first thing you’ll want to do is paint the stainless steel cup. If you are planning on making a silver glitter mug, then just leave it plain.
For all other glitter colors, I like to spray paint it a matching paint color to cut down on the number of layers of glitter you’ll need to apply.
You can make one without painting it, but you’ll probably need 2-3 layers of glitter to make sure you don’t see the stainless color underneath.
To see my full detailed post with a video tutorial on how I spray paint stainless steel mugs, click here. On this post, I have a video of me spraying painting this pink cup at the bottom. These are mine after they are painted.

All of the glitter steps are in the video, so make sure to watch it at the top or on the side.
Once they are fully dry, you can start the glitter step. Make sure to tape off the top again if you took the tape off.
You are going to apply one even layer of mod podge all around the cup. Make sure to put a plate or wax paper under you to catch the glitter! Then start pouring the glitter on the mod podge while you are rotating your cup.
Once it is completely covered, turn it upside down to dry for at least an hour. Then use a dry paintbrush and gently brush off the extra glitter. You can remove the tape at this point.
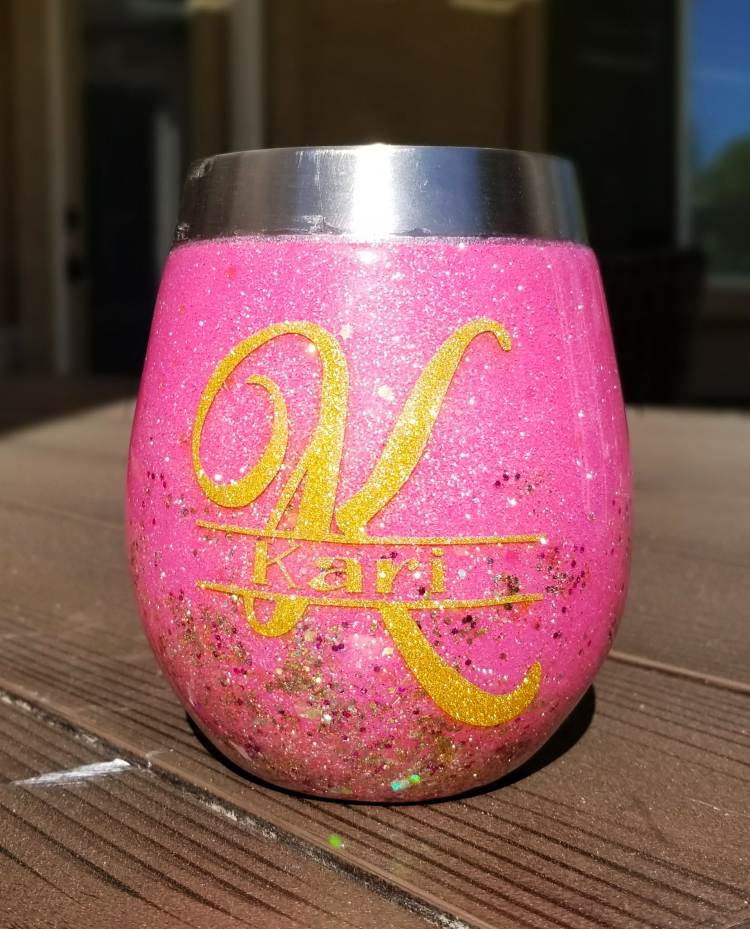
Now, here is where the personalization comes in! You can leave it all pink or you can add another color glitter to give it an ombre effect. I decided to add some gold and chunky pink glitter to the bottom.
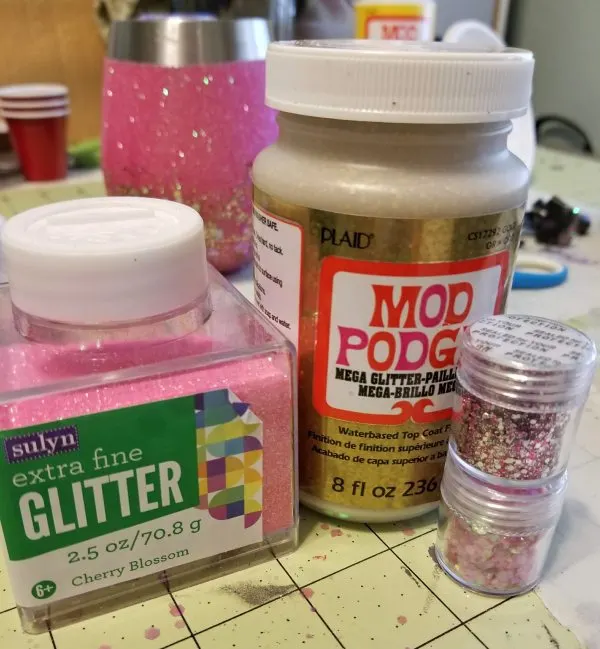
This is all the glitter I used for the pink glitter cup. I made this two tone glitter cup different than my large ombre epoxy tumbler.

I poured a little bit of the gold glitter mod podge into a container and added some fine dark pink and silver glitter to it from the pack.
I brushed this all over the bottom half heavily and made wispy brush marks in the middle so it would be less for the ombre effect.
I then sprinkled on the chunky pink glitter on the very bottom and a little in the middle.


There is no right or wrong to this! Let it dry again and if you want more glitter in certain areas, apply just some more glittered mod podge or both mod podge and a little more chunky or fine glitter.
Let it fully dry for 24 hours and then you can gently brush off extra glitter before the epoxy step.
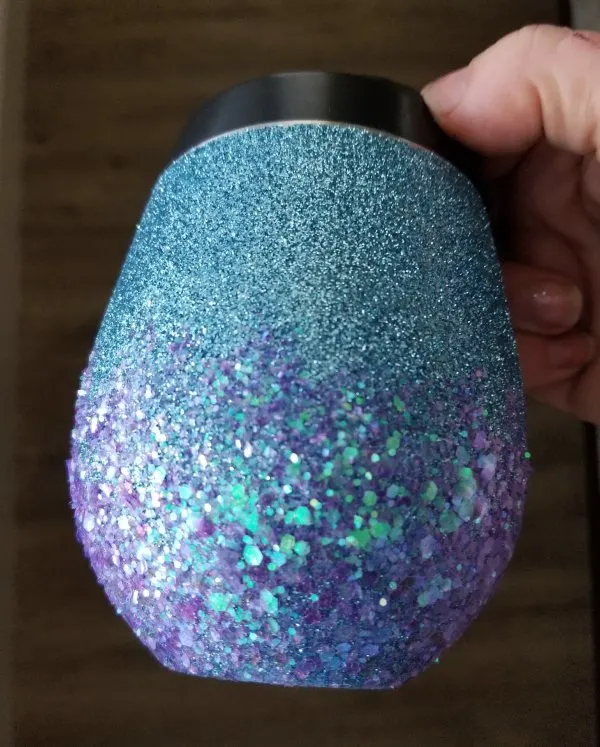
For the blue glitter cup, I did it a little bit differently. I applied the base Cerulean glitter in the same manner and let it dry for an hour.

I didn’t use glitter mod podge for this cup. I just used regular mod podge and applied it the same way as I did in the video. I then added a layer of mixed purple glitter (in the above skinny tube) over the mod podge.
I let it dry for an hour, brushed off the extra, and then added another layer of mod podge to the very bottom and a few wispy strokes up. Then I applied a bit of the chunky glitter on that.
I probably could have just mixed the two together, but I wanted just purple in the midsection.

Remove the tape and let it dry overnight. Then you are ready to add your first layer of epoxy!
I applied two layers of clear epoxy (10ml of A & B) to both of these personalized stemless wine glasses, but during the epoxy step, some of the chunky glitter moved around with the epoxy. So, a few of the chunky glitter slid up the cup but I really liked that effect!
Click here for my how to apply epoxy and decals to tumblers tutorial.
I used my new DIY cup turner and wow, it went so much faster!

I love adding the epoxy and then letting it turn for a few hours while I do something else and not have to worry about turning and checking it every few minutes.
Find out how I made the DIY motorized tumbler turner here!

On the other side of the pink personalized stemless wine glass, I added a monogram with glitter vinyl. I have a whole alphabet split monogram set for FREE here if you’d like to use it!


For the blue glitter tumbler, I found this cute mermaid saving at lovesvg.com. I used holographic vinyl and white vinyl for the decal, so it looks different color depending on the lighting.


On the backside is a monogram with the holographic vinyl. I use MonogramIt Lite app to create my monograms!


I have to say, I love how these little glitter cups came out! I am definitely making some for the upcoming holidays.
They also make holding the stainless steel stemless tumblers easier since you’re hand doesn’t get cold.
Please let me know if you have any questions!
If you’d like to save this idea for later, hover over the top left of the following picture and PIN it!

Thanks for stopping by ! Have a creative day!


April Sullen
Monday 13th of July 2020
Hi can you please tell me what color holographic vinyl did you use because I see that they have many different colors to choose from online ?
Leap of Faith Crafting
Tuesday 14th of July 2020
I know, there are a ton and I have a bunch of them too. I think I had a pack of different blue ones, I believe opal and maybe pearl if I'm remembering correctly.
Jeniece
Monday 7th of January 2019
Hi! Did you ever put decals on a mug and spray it with something to make it dishwasher safe? Or is epoxy the only way to do that? Thanks!
Leap of Faith Crafting
Monday 7th of January 2019
Hi Jeniece, stainless steel tumblers say they should only be hand-washed anyway because it messes with whatever it is that keeps them so cold. On a regular mug, I have put a decal on it and my family forgot to only hand-wash it and it came out perfectly fine. We don't use heat to try, so that might have had something to do with it. I was actually surprised! There is dishwasher safe mod podge but I have heard it doesn't always work. If you find something, I'd love to know!
Shaylan
Thursday 8th of November 2018
How do you add your monograms and epoxy??
Leap of Faith Crafting
Friday 9th of November 2018
HI Shaylan, I have a whole video tutorial on how I add the monograms and epoxy linked to in the post. It won't let me link to it the comments but you can search DIY Glitter tumbler. Thanks!
Jodi Morales
Thursday 18th of October 2018
Hi I am considering taking a leap of faith also, and dont mean to be pushy but I was wondering how much you are able to make a month, and how and where you advertise? Thank you for your help, Jodi Morales
Leap of Faith Crafting
Friday 19th of October 2018
Hi Jodi, thanks for reaching out! Bloggers make money in a range of ways. It usually takes a few years to really make some good money. I make most of my money through my Ad agency, Mediavine. They are awesome and I love working with them! Some bloggers make a good amount of money by sponsored posts, but I rarely do those. Affiliate links is another good way. I make the most with Amazon links. The one thing that is tough is your pay isn't consistent. It will change during the year, depending on quarters and holidays. I consider myself a mid size blogger. I am making anywhere from $1000-5000 a month just on ads and affiliate links, but it varies. If you google it, there are a ton of bloggers out there that will walk you step by step through the process. It definitely is a learning curve! Good luck!